Where Can Phase Shifts in Signals Cause Problems Exploring the Impact on Signal Processing

where can phase shifts in signals cause problems exploring the impact on signal processing

Phase shifts in signals can have a significant impact on various aspects of signal processing, leading to distortions, inaccuracies, and errors in the processed signals. Understanding the impact of phase shifts is crucial for developing accurate and reliable signal processing algorithms and systems. In this comprehensive guide, we will explore the specific areas where phase … Read more

Voltage vs Voltage Drop: A Comprehensive Guide for Electronics Students

voltage vs voltage drop

Voltage and voltage drop are fundamental concepts in electronics that are closely related but distinct. Understanding the nuances between these two terms is crucial for designing, analyzing, and troubleshooting electronic circuits. This comprehensive guide will delve into the technical details, providing a hands-on approach for electronics students to master the intricacies of voltage and voltage drop.

Understanding Voltage

Voltage, also known as electrical potential difference, is the force that drives the flow of electrons through a circuit. It is the measure of the potential energy difference between two points in an electrical system. Voltage is typically measured in volts (V), and it is the driving force that pushes the current through the circuit.

The voltage in a circuit can be generated by various sources, such as batteries, power supplies, or generators. These sources convert different forms of energy (chemical, mechanical, or electromagnetic) into electrical energy, which is then used to power the circuit.

The voltage in a circuit can be further classified into two types:

  1. Source Voltage: This is the voltage provided by the power source, such as a battery or power supply. It is the potential difference between the positive and negative terminals of the power source.

  2. Load Voltage: This is the voltage across the load or component in the circuit, such as a resistor or a motor. It is the potential difference between the two terminals of the load.

Understanding the relationship between source voltage and load voltage is crucial for analyzing and designing electronic circuits.

Voltage Drop Explained
voltage vs voltage drop

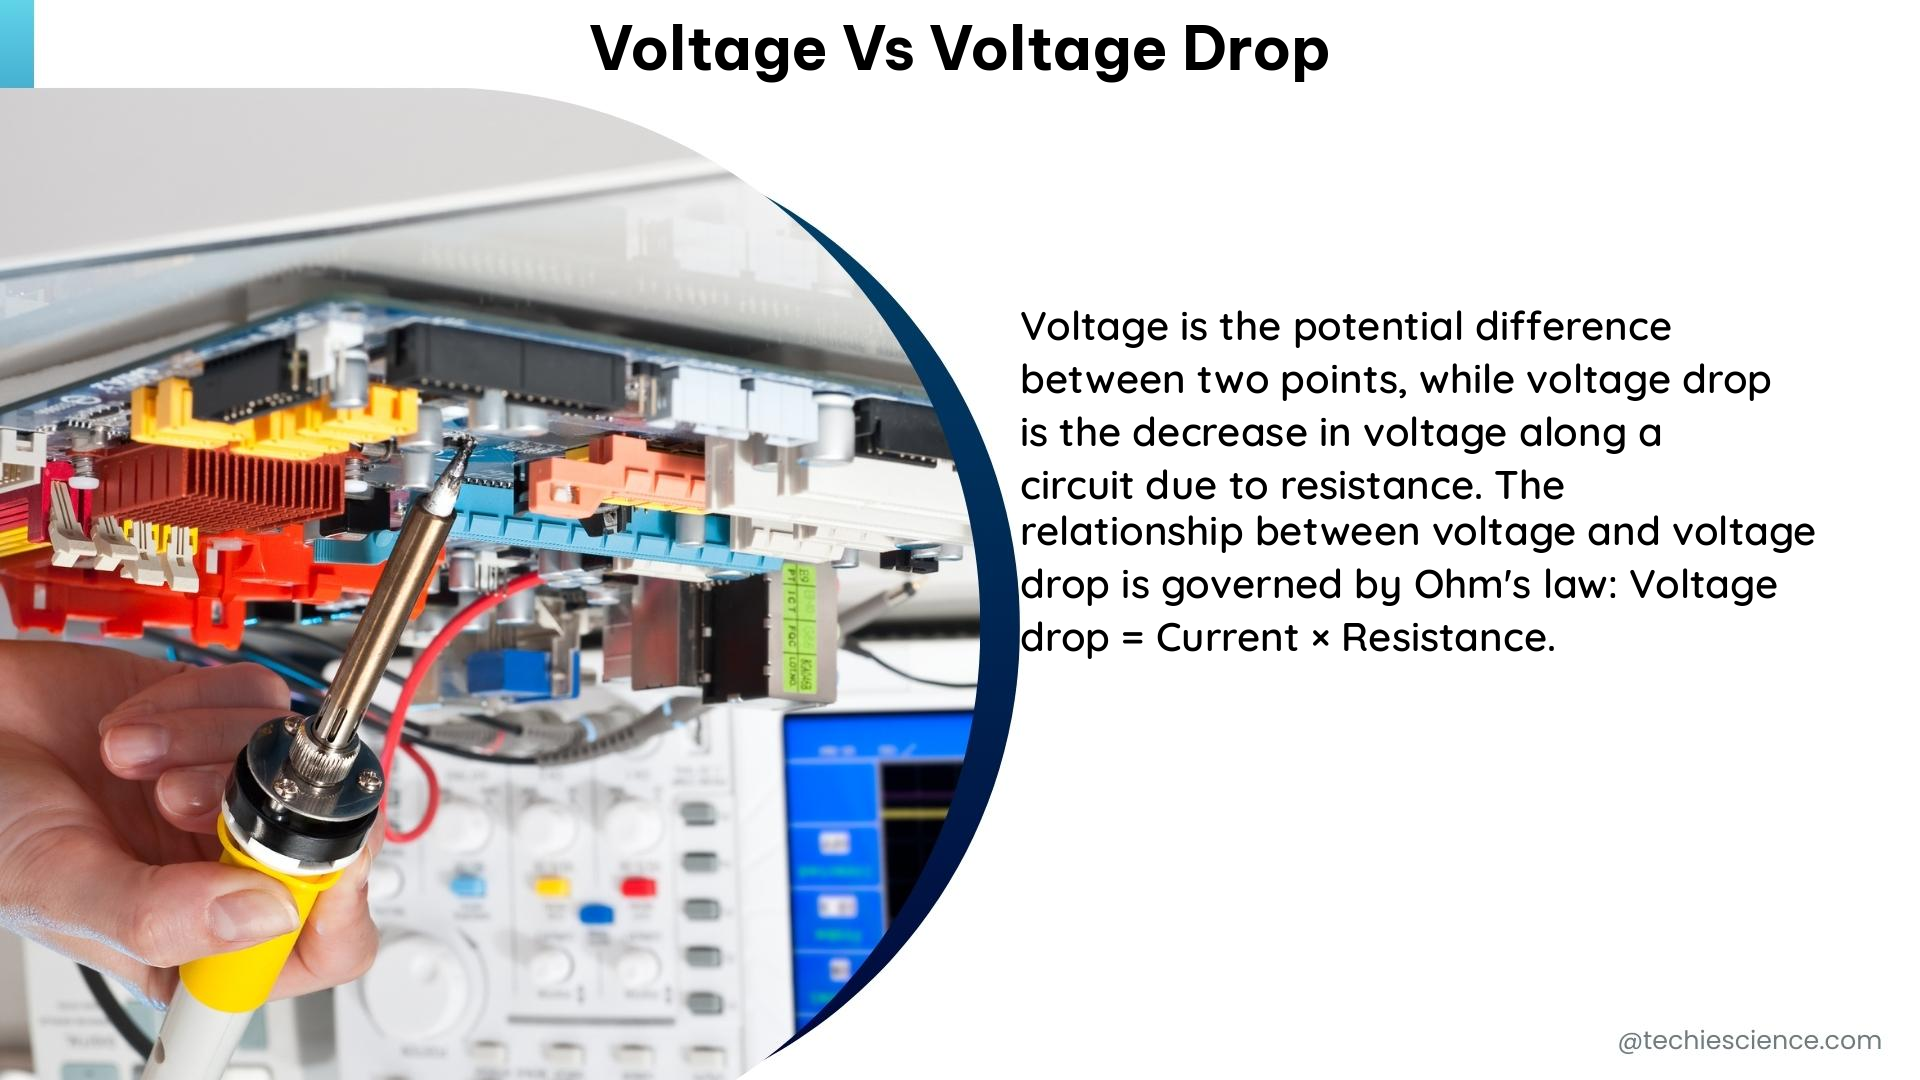
Voltage drop, on the other hand, is the reduction in voltage across a component or section of a circuit due to the flow of current. When current flows through a resistive element, such as a wire, a resistor, or a transistor, some of the energy is dissipated as heat, resulting in a decrease in the voltage across that element.

The voltage drop can be calculated using Ohm’s law, which states that the voltage drop (V) is equal to the product of the current (I) and the resistance (R) of the component or section of the circuit:

V = I × R

This means that the voltage drop is directly proportional to the current flowing through the circuit and the resistance of the component or section.

Voltage drop is an important consideration in electronic circuit design, as it can affect the performance and efficiency of the circuit. Excessive voltage drop can lead to reduced power delivery to the load, which can result in decreased performance or even component failure.

Factors Affecting Voltage Drop

Several factors can influence the voltage drop in a circuit, including:

  1. Resistance: The resistance of the components or wires in the circuit directly affects the voltage drop. Higher resistance leads to a greater voltage drop.

  2. Current: The amount of current flowing through the circuit also plays a crucial role. Higher current levels result in a larger voltage drop.

  3. Wire Length and Gauge: The length and gauge (thickness) of the wires in the circuit can impact the voltage drop. Longer and thinner wires have higher resistance, leading to a greater voltage drop.

  4. Temperature: The resistance of conductors can change with temperature, which can affect the voltage drop. Generally, as temperature increases, the resistance of the conductors increases, leading to a higher voltage drop.

  5. Inductive and Capacitive Effects: In circuits with inductive or capacitive components, the voltage drop can be influenced by the frequency of the signal and the reactance of these components.

Understanding these factors is essential for accurately calculating and predicting the voltage drop in a circuit, which is crucial for ensuring the proper operation and performance of electronic devices.

Measuring Voltage and Voltage Drop

Accurately measuring voltage and voltage drop is crucial for troubleshooting and analyzing electronic circuits. There are several methods and tools available for this purpose:

  1. Multimeter: A digital multimeter is the most common tool used to measure voltage and voltage drop. It can be used to measure the voltage across a component or the voltage drop across a section of the circuit.

  2. Oscilloscope: An oscilloscope is a powerful tool that can be used to visualize and measure the voltage waveforms in a circuit. It can provide detailed information about the voltage levels, waveform shapes, and voltage drop over time.

  3. Voltage Probes: Specialized voltage probes can be used in conjunction with a multimeter or oscilloscope to measure voltage and voltage drop at specific points in the circuit. These probes are designed to minimize the impact on the circuit under test.

  4. Voltage Divider Circuits: In some cases, a voltage divider circuit can be used to measure the voltage drop across a component or section of the circuit. By carefully designing the voltage divider, the voltage drop can be measured without significantly affecting the circuit operation.

When measuring voltage and voltage drop, it is important to consider the following best practices:

  • Ensure that the measurement device (multimeter, oscilloscope, etc.) is properly calibrated and connected to the circuit.
  • Avoid loading the circuit under test, as this can affect the voltage and voltage drop measurements.
  • Consider the input impedance of the measurement device and ensure it is high enough to minimize the impact on the circuit.
  • Carefully select the appropriate measurement range and settings on the measurement device to obtain accurate and reliable results.

By following these best practices, you can obtain accurate and reliable measurements of voltage and voltage drop, which are essential for understanding and troubleshooting electronic circuits.

Calculating Voltage Drop

As mentioned earlier, the voltage drop across a component or section of a circuit can be calculated using Ohm’s law:

V = I × R

Where:
– V is the voltage drop (in volts)
– I is the current flowing through the component or section (in amperes)
– R is the resistance of the component or section (in ohms)

Let’s consider a practical example to illustrate the calculation of voltage drop:

Suppose you have a circuit with a resistor of 10 ohms, and a current of 0.5 amps is flowing through it. Calculate the voltage drop across the resistor.

Using the Ohm’s law formula:
V = I × R
V = 0.5 A × 10 ohms
V = 5 volts

Therefore, the voltage drop across the 10-ohm resistor with a current of 0.5 amps is 5 volts.

It’s important to note that the voltage drop calculation can be more complex in circuits with multiple components, varying resistances, or non-linear elements. In such cases, you may need to use more advanced analysis techniques, such as Kirchhoff’s laws or network analysis methods.

Minimizing Voltage Drop

Minimizing voltage drop is crucial in electronic circuit design, as it can help improve the efficiency, performance, and reliability of the system. Here are some strategies for minimizing voltage drop:

  1. Reduce Resistance: Lowering the resistance of the components or wires in the circuit can significantly reduce the voltage drop. This can be achieved by using thicker wires, choosing components with lower resistance, or optimizing the circuit layout to minimize the length of the conductive paths.

  2. Increase Wire Gauge: Using thicker wires (higher gauge number) can reduce the resistance and, consequently, the voltage drop. This is particularly important in high-current circuits or long-distance power distribution.

  3. Optimize Circuit Layout: Carefully designing the circuit layout to minimize the length of the conductive paths can help reduce the overall resistance and voltage drop.

  4. Use Low-Resistance Components: Selecting components with low internal resistance, such as high-quality resistors, connectors, and switches, can help minimize the voltage drop.

  5. Employ Voltage Regulation: Incorporating voltage regulation circuits, such as linear regulators or switching regulators, can help maintain a stable output voltage despite changes in load or input voltage, effectively reducing the voltage drop.

  6. Implement Parallel Paths: Providing multiple parallel paths for the current to flow can distribute the current and reduce the voltage drop across individual components or sections of the circuit.

  7. Monitor and Maintain the Circuit: Regularly monitoring the voltage drop and maintaining the circuit components can help identify and address any issues that may contribute to excessive voltage drop over time.

By applying these strategies, you can effectively minimize the voltage drop in your electronic circuits, ensuring optimal performance, efficiency, and reliability.

Practical Applications and Considerations

Voltage and voltage drop are crucial concepts in a wide range of electronic applications, including:

  1. Power Distribution Systems: Accurate understanding of voltage drop is essential for designing efficient power distribution systems, such as those found in buildings, vehicles, or industrial facilities, to ensure proper voltage levels at the load.

  2. Electronic Circuits: Analyzing and managing voltage drop is crucial in the design of electronic circuits, from simple resistor-capacitor (RC) networks to complex digital and analog circuits, to ensure proper operation and prevent component damage.

  3. Automotive Electrical Systems: Automotive electrical systems rely heavily on the management of voltage and voltage drop, particularly in the context of battery charging, lighting, and other vehicle subsystems.

  4. Renewable Energy Systems: In renewable energy systems, such as solar photovoltaic or wind power, voltage drop analysis is essential for optimizing the power transmission and distribution infrastructure.

  5. Industrial Control Systems: Voltage drop is a critical consideration in industrial control systems, where accurate voltage levels are necessary for the proper operation of sensors, actuators, and other components.

When working with voltage and voltage drop in practical applications, it’s important to consider the following:

  • Safety: Ensure that all voltage and current measurements are performed safely, following appropriate safety protocols and using properly insulated tools and equipment.
  • Accuracy: Strive for accurate measurements and calculations to avoid design errors or operational issues.
  • Regulatory Compliance: Adhere to relevant electrical codes, standards, and regulations that may apply to your specific application or industry.
  • Thermal Management: Consider the thermal effects of voltage drop, as it can lead to power dissipation and heat generation, which may require additional cooling or thermal management strategies.
  • Dynamic Conditions: Be aware of the potential for voltage fluctuations or transients in the circuit, which can affect the voltage drop and the overall system performance.

By understanding the nuances of voltage and voltage drop, and applying the appropriate strategies and considerations, electronics students can develop the skills and knowledge necessary to design, analyze, and troubleshoot a wide range of electronic systems and circuits.

Conclusion

Voltage and voltage drop are fundamental concepts in electronics that are closely related but distinct. Understanding the relationship between these two terms is crucial for designing, analyzing, and troubleshooting electronic circuits.

In this comprehensive guide, we have explored the technical details of voltage and voltage drop, including their definitions, factors affecting voltage drop, measurement techniques, and calculation methods. We have also discussed strategies for minimizing voltage drop and the practical applications of these concepts in various electronic systems.

By mastering the intricacies of voltage and voltage drop, electronics students can develop the skills and knowledge necessary to design, analyze, and troubleshoot a wide range of electronic circuits and systems, ensuring their optimal performance, efficiency, and reliability.

References

  1. Semiconductor Engineering, “Is Your Voltage Drop Flow Obsolete?”, 2023-11-13, https://semiengineering.com/is-your-voltage-drop-flow-obsolete/
  2. Lectromec, “Determining Voltage Drop”, 2019-10-11, https://lectromec.com/determining-voltage-drop/
  3. Physics Stack Exchange, “I don’t understand what we really mean by voltage drop”, 2013-03-05, https://physics.stackexchange.com/questions/55948/i-dont-understand-what-we-really-mean-by-voltage-drop
  4. Electrical Engineering Stack Exchange, “What is the difference between voltage and voltage drop?”, 2015-06-24, https://electronics.stackexchange.com/questions/159524/what-is-the-difference-between-voltage-and-voltage-drop
  5. Texas Instruments, “Understanding Voltage Drop in Electrical Systems”, 2019, https://www.ti.com/lit/an/slva780/slva780.pdf

Mastering Voltage Divider in Series: A Comprehensive Guide

voltage divider in series

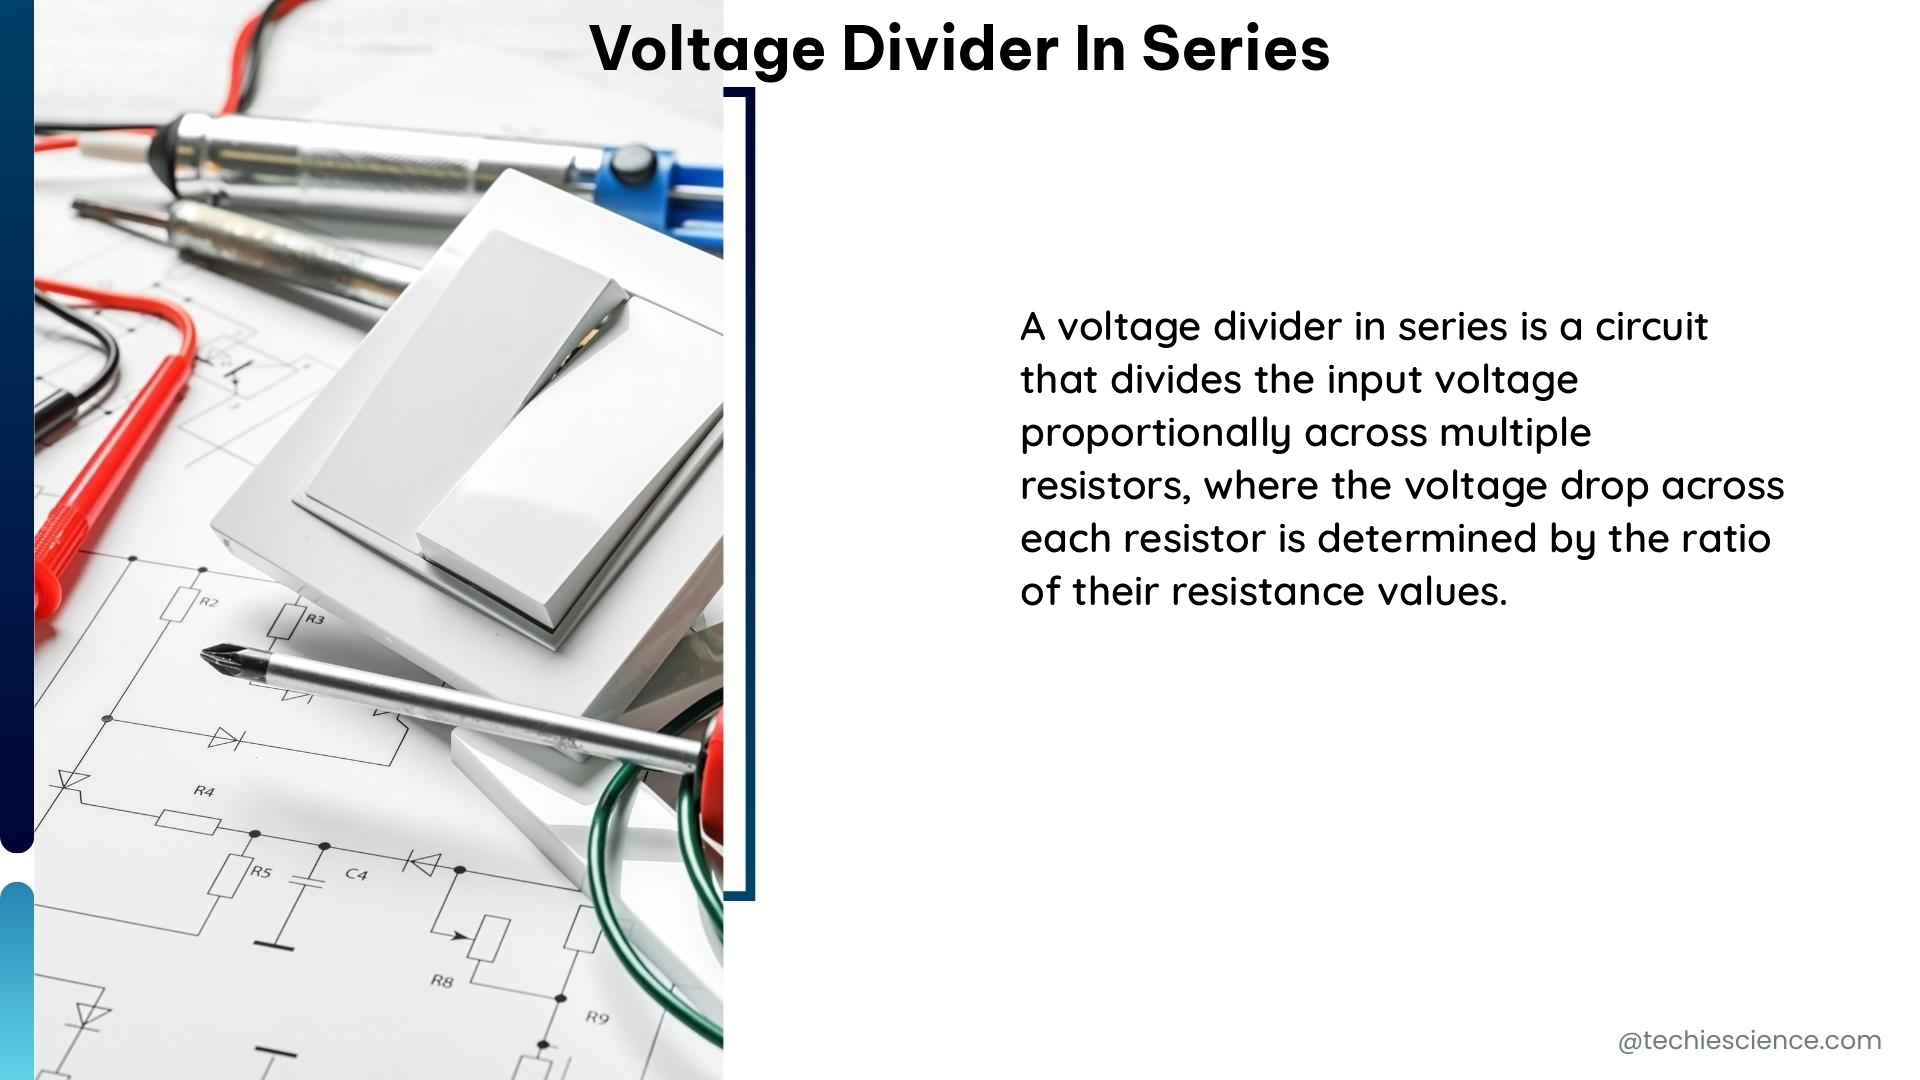
A voltage divider is a simple yet powerful circuit that allows you to reduce a high voltage to a lower one by using two resistors connected in series. This technique is widely used in electronics, from power supply design to sensor interfacing. In this comprehensive guide, we’ll dive deep into the intricacies of voltage divider in series, equipping you with the knowledge and tools to design and implement these circuits effectively.

Understanding the Basics of Voltage Divider in Series

A voltage divider in series consists of two resistors, R1 and R2, connected in series between the input voltage (Vin) and the ground. The output voltage (Vout) is taken from the junction between the two resistors. The formula to calculate the output voltage is:

Vout = Vin * (R2 / (R1 + R2))

where Vin is the input voltage, and R1 and R2 are the resistor values.

For example, if you have a 12V input voltage and you want to reduce it to 6V, you can use a voltage divider with R1 = 10kΩ and R2 = 10kΩ. The output voltage would be:

Vout = 12V * (10kΩ / (10kΩ + 10kΩ)) = 6V

Accounting for Load Current

voltage divider in series

One crucial factor to consider when using a voltage divider in series is the effect of load current. As the load current increases, the voltage drop across the resistors will also increase, causing the output voltage to decrease. To account for this, we can use the following formula:

Vout = Vin * (R2 / (R1 + R2)) * (1 - (Iload * R2 / (Vin + Iload * R1)))

where Iload is the load current.

For instance, if we have a 12V input voltage, a voltage divider with R1 = 10kΩ and R2 = 10kΩ, and a load current of 1mA, the output voltage would be:

Vout = 12V * (10kΩ / (10kΩ + 10kΩ)) * (1 - (0.001A * 10kΩ / (12V + 0.001A * 10kΩ))) = 5.88V

Choosing Resistor Values

When designing a voltage divider in series, it’s important to choose the resistor values carefully. Here are some key considerations:

  1. Resistance Ratio: The ratio of the two resistor values (R2/R1) determines the output voltage. A higher ratio will result in a lower output voltage.

  2. Power Rating: The resistors must be able to handle the power dissipated across them, which is given by the formula:

P = (Vin^2 * R2) / (R1 + R2)^2

Ensure that the power rating of the resistors is higher than the calculated power dissipation.

  1. Tolerance: Resistors with tight tolerances (e.g., 1% or 0.1%) should be used to ensure accurate voltage division. This is especially important when the voltage divider is used for precision measurements or sensitive circuits.

  2. Input Impedance: The input impedance of the voltage divider is the parallel combination of R1 and R2. This impedance should be high enough to avoid loading the source circuit and affecting the input voltage.

  3. Output Impedance: The output impedance of the voltage divider is the parallel combination of R1 and R2. This impedance should be low enough to drive the load circuit without significant voltage drop.

Advanced Considerations

  1. Temperature Effects: Resistor values can change with temperature, which can affect the output voltage of the voltage divider. Using resistors with a low temperature coefficient (TC) can help mitigate this issue.

  2. Noise and Stability: Voltage dividers can be susceptible to noise and instability, especially when used in sensitive analog circuits. Techniques like filtering, shielding, and grounding can help improve the noise performance.

  3. Voltage Regulation: In some applications, the output voltage of the voltage divider needs to be regulated against changes in the input voltage or load current. This can be achieved by using active voltage regulation circuits, such as op-amp-based regulators or switching regulators.

  4. Voltage Divider Cascading: Multiple voltage dividers can be cascaded to achieve larger voltage reduction ratios. However, this can introduce additional loading effects and complexity, so careful design is required.

  5. Voltage Divider Applications: Voltage dividers have a wide range of applications, including:

  6. Analog-to-digital converter (ADC) input conditioning
  7. Sensor signal conditioning
  8. Biasing circuits for amplifiers and transistors
  9. Adjustable power supply design
  10. Voltage monitoring and measurement

Practical Examples and Calculations

Let’s explore some practical examples of voltage divider in series circuits and the associated calculations.

Example 1: Reducing a 24V Supply to 12V

Suppose you have a 24V power supply and you need to reduce it to 12V for a specific circuit. You can use a voltage divider with the following resistor values:

  • R1 = 10kΩ
  • R2 = 10kΩ

The output voltage can be calculated as:

Vout = 24V * (10kΩ / (10kΩ + 10kΩ)) = 12V

Example 2: Voltage Divider with Load Current

Consider a voltage divider with the following parameters:

  • Vin = 15V
  • R1 = 20kΩ
  • R2 = 10kΩ
  • Iload = 1mA

The output voltage can be calculated as:

Vout = 15V * (10kΩ / (20kΩ + 10kΩ)) * (1 - (0.001A * 10kΩ / (15V + 0.001A * 20kΩ))) = 7.5V

Example 3: Cascaded Voltage Dividers

Suppose you need to reduce a 48V supply to 5V. You can use a cascaded voltage divider with the following resistor values:

  • R1 = 100kΩ
  • R2 = 20kΩ
  • R3 = 5kΩ

The output voltage can be calculated as:

Vout = 48V * (20kΩ / (100kΩ + 20kΩ)) * (5kΩ / (20kΩ + 5kΩ)) = 5V

Conclusion

Voltage divider in series is a fundamental and versatile circuit in electronics. By understanding the principles, formulas, and design considerations, you can effectively utilize voltage dividers to solve a wide range of problems, from power supply design to sensor interfacing. This comprehensive guide has provided you with the knowledge and tools to master voltage divider in series circuits and apply them in your electronic projects.

Reference:

  1. Voltage Dividers and Voltage Division Circuits – Electronics Tutorials: https://www.electronics-tutorials.ws/dccircuits/voltage-divider.html
  2. Resistor in series, or voltage divider? – Electronics Stack Exchange: https://electronics.stackexchange.com/questions/632528/resistor-in-series-or-voltage-divider
  3. Measure 20V without Voltage Dividers! – Arduino Forum: https://forum.arduino.cc/t/measure-20v-without-voltage-dividers/900767

Deriving the Frequency Spectrum from Time Domain Data: A Comprehensive Guide

how is the frequency spectrum derived from time domain data a comprehensive guide

Deriving the frequency spectrum from time-domain data is a fundamental technique in signal processing, enabling the analysis of periodic behavior, identification of dominant frequencies, and extraction of valuable insights from complex waveforms. This comprehensive guide will delve into the mathematical foundations, practical implementation, and real-world applications of this powerful analytical tool. Understanding the Fourier Transform … Read more

How to Find Series Resistance: Detailed Insights

how to find series resistance detailed insights

Summary

Series resistance is a fundamental concept in electronics that describes the total resistance in a circuit where multiple resistors are connected end-to-end. Understanding how to accurately calculate and measure series resistance is crucial for designing, analyzing, and troubleshooting electronic circuits. This comprehensive guide will provide you with detailed insights into the various methods and techniques for finding series resistance, including theoretical explanations, practical examples, and references to further your understanding.

Understanding Series Resistance

how to find series resistance detailed insights

Series resistance, denoted as R_series, is the sum of all the individual resistances in a circuit where the resistors are connected in a series configuration. This means that the current flowing through each resistor is the same, and the voltage drops across each resistor add up to the total voltage drop in the circuit.

The formula for calculating series resistance is:

R_series = R1 + R2 + … + Rn

Where R1, R2, …, Rn are the individual resistor values in the series circuit.

Ohm’s Law and Kirchhoff’s Laws

The series resistance formula is derived from the fundamental principles of Ohm’s law and Kirchhoff’s laws. Ohm’s law states that the current (I) flowing through a resistor is directly proportional to the voltage (V) across the resistor, and inversely proportional to the resistance (R) of the resistor, as expressed by the equation:

V = I × R

Kirchhoff’s voltage law (KVL) states that the sum of all the voltage drops around a closed loop in a circuit must be equal to zero. In a series circuit, the voltage drops across each resistor add up to the total voltage applied to the circuit.

By applying these principles, we can derive the series resistance formula and understand how to calculate the total resistance in a series circuit.

Practical Example

Let’s consider a simple series circuit with three resistors:

  • R1 = 100 Ω
  • R2 = 200 Ω
  • R3 = 300 Ω

To find the series resistance, we can use the formula:

R_series = R1 + R2 + R3
R_series = 100 Ω + 200 Ω + 300 Ω
R_series = 600 Ω

This means that the total resistance in the series circuit is 600 Ω.

Measuring Series Resistance

In addition to calculating the series resistance using the formula, you can also measure the series resistance directly using a multimeter or other electronic measurement tools.

Using a Multimeter

To measure the series resistance using a multimeter, follow these steps:

  1. Disconnect the circuit from any power source to ensure safety.
  2. Set the multimeter to the resistance (Ω) measurement mode.
  3. Connect the multimeter leads across the series resistors, ensuring that the current path is not interrupted.
  4. The multimeter will display the total series resistance.

Verifying the Calculation

To verify the calculated series resistance, you can measure the voltage and current across each individual resistor and then use Ohm’s law to calculate the resistance of each resistor. The sum of these individual resistances should equal the series resistance.

For example, let’s say you measure the following values in the previous circuit:

  • Across R1: V1 = 2 V, I = 0.02 A
  • Across R2: V2 = 4 V, I = 0.02 A
  • Across R3: V3 = 6 V, I = 0.02 A

Using Ohm’s law, you can calculate the individual resistances:

  • R1 = V1 / I = 2 V / 0.02 A = 100 Ω
  • R2 = V2 / I = 4 V / 0.02 A = 200 Ω
  • R3 = V3 / I = 6 V / 0.02 A = 300 Ω

The sum of these individual resistances is:

R1 + R2 + R3 = 100 Ω + 200 Ω + 300 Ω = 600 Ω

This matches the calculated series resistance, verifying the accuracy of the measurement and calculation.

Advanced Techniques for Finding Series Resistance

In addition to the basic calculation and measurement methods, there are more advanced techniques and tools that can be used to find series resistance in complex circuits.

Circuit Simulation

Using circuit simulation software, such as SPICE (Simulation Program with Integrated Circuit Emphasis) or Multisim, you can model the circuit and accurately calculate the series resistance. These tools allow you to input the circuit parameters, including the individual resistor values, and the software will provide the calculated series resistance.

Simulation software can be particularly useful for analyzing more complex circuits, where the series resistance may not be easily calculated by hand. These tools can also help you explore different scenarios and understand the impact of changes in the circuit on the series resistance.

Impedance Measurement

In some cases, especially in high-frequency circuits or circuits with reactive components (capacitors and inductors), the series resistance may be influenced by the impedance of the circuit. In such situations, you can use impedance measurement techniques, such as using an impedance analyzer or a network analyzer, to directly measure the series resistance.

Impedance measurement tools can provide more accurate and comprehensive information about the circuit’s behavior, including the series resistance, as well as other parameters like reactance and phase angle.

Theoretical Analysis

For a deeper understanding of series resistance, you can refer to electronics textbooks and research papers that provide theoretical explanations and mathematical derivations of the series resistance formula. These resources can help you gain a more profound grasp of the underlying principles and the factors that influence series resistance in different circuit configurations.

Some recommended textbooks and resources for further study include:

  1. “Electronic Devices and Circuit Theory” by Boylestad and Nashelsky
  2. “The Art of Electronics” by Horowitz and Hill
  3. “Fundamentals of Electric Circuits” by Alexander and Sadiku
  4. “IEEE Transactions on Circuits and Systems” journal

By combining the practical techniques with a solid theoretical foundation, you can develop a comprehensive understanding of how to accurately find and analyze series resistance in electronic circuits.

Conclusion

Mastering the concept of series resistance is crucial for effectively designing, analyzing, and troubleshooting electronic circuits. This guide has provided you with detailed insights into the various methods and techniques for finding series resistance, including theoretical explanations, practical examples, and references to further your understanding.

Remember, the key to accurately determining series resistance lies in understanding the fundamental principles of Ohm’s law and Kirchhoff’s laws, as well as being proficient in using the appropriate measurement tools and simulation software. By applying these techniques, you can confidently tackle a wide range of series resistance-related challenges in your electronics projects and studies.

References

  1. Boylestad, R. L., & Nashelsky, L. (2013). Electronic Devices and Circuit Theory (11th ed.). Pearson.
  2. Horowitz, P., & Hill, W. (2015). The Art of Electronics (3rd ed.). Cambridge University Press.
  3. Alexander, C. K., & Sadiku, M. N. O. (2012). Fundamentals of Electric Circuits (5th ed.). McGraw-Hill Education.
  4. IEEE Transactions on Circuits and Systems. (n.d.). IEEE Xplore Digital Library. https://ieeexplore.ieee.org/xpl/RecentIssue.jsp?punumber=8919
  5. Electronics Tutorials. (n.d.). Series and Parallel Circuits. https://www.electronics-tutorials.ws/dcac/dc-series-circuits.html

Where are Fourier and Laplace Transforms Used in the Study of Signals?

where are fourier and laplace transforms used in the study of signals

Fourier and Laplace transforms are powerful mathematical tools that play a crucial role in the analysis and understanding of signals in various fields of engineering and science. These transforms allow us to study the frequency domain representation of signals, which is essential for a wide range of applications, from signal processing and communication systems to … Read more

Mastering Voltage Drop Calculations for Single-Phase Circuits: A Comprehensive Guide

voltage drop for single phase

Voltage drop in a single-phase circuit is a critical consideration in electrical system design, as it can significantly impact the performance and efficiency of the connected devices. Understanding the factors that contribute to voltage drop and the methods for calculating it is essential for ensuring proper operation and compliance with electrical codes and standards.

Understanding Voltage Drop in Single-Phase Circuits

Voltage drop in a single-phase circuit is the decrease in voltage between the source and the load due to the resistance of the wires carrying the current. This voltage drop can lead to a reduction in the voltage available at the load, which can cause issues with the proper operation of electrical devices.

The voltage drop in a single-phase circuit can be calculated using the formula:

Vd = (I x L x R) / 1000

Where:
Vd is the voltage drop in volts
I is the current in amperes
L is the length of the wire in meters
R is the resistance of the wire in ohms per kilometer

Factors Affecting Voltage Drop

voltage drop for single phase

The resistance of the wire, which is a key factor in the voltage drop calculation, depends on several variables:

  1. Wire Material: The most common materials used for electrical wiring are copper and aluminum. Copper has a lower resistance per unit length compared to aluminum, making it a more efficient conductor.

  2. Cross-Sectional Area: The cross-sectional area of the wire, measured in square millimeters (mm²), also affects the resistance. Larger cross-sectional areas have lower resistance, resulting in lower voltage drop.

  3. Temperature: The resistance of a wire increases as the temperature increases. The resistance values provided in this guide are based on a temperature of 20°C (68°F).

  4. Length of the Wire: The longer the wire, the greater the voltage drop, as the resistance increases with the length of the wire.

  5. Power Factor: The power factor, which is the ratio of the real power to the apparent power, can also affect the voltage drop calculation. The formula for voltage drop considering the power factor is:

Vd = (I x L x R x Pf) / 1000

Where Pf is the power factor.

Resistance Values for Common Wire Sizes

The resistance of copper and aluminum wires at 20°C (68°F) can be found in the following tables:

Copper Wires at 20°C (68°F)

Wire Size (mm²) Resistance (Ω/km)
1.5 0.0178
2.5 0.0068
4 0.0037
6 0.0024

Aluminum Wires at 20°C (68°F)

Wire Size (mm²) Resistance (Ω/km)
2.5 0.0274
4 0.0137
6 0.0091

Voltage Drop Limits and Regulations

The National Electrical Code (NEC) recommends a maximum voltage drop of 5% for the entire electrical system, including the service drop and branch circuits. However, some local building codes, such as the Florida Building Code (FBC Chapter 13), mandate a more stringent limit of 3% on branch circuits (2% service drop/3% branch drop or reverse, according to the local inspector).

Measuring Voltage Drop

To measure the voltage drop across just the branch circuit wires, with no load connected, you can use a voltage drop calculator like the one provided by Southwire. This calculator allows you to input the conductor size, circuit distance, phase, current, power factor, and units for length of cable run to calculate the voltage drop.

When using a voltage drop calculator, it’s important to ensure that the input values accurately reflect the actual electrical system. Factors such as wire size, length, and power factor can significantly impact the calculated voltage drop.

Practical Examples and Calculations

Let’s consider a few practical examples to illustrate the voltage drop calculations for single-phase circuits:

  1. Example 1: A single-phase circuit with the following parameters:
  2. Current (I): 20 A
  3. Wire Length (L): 50 m
  4. Wire Size: Copper, 2.5 mm²
  5. Power Factor (Pf): 0.85

Voltage drop calculation:
Vd = (I x L x R x Pf) / 1000
Vd = (20 x 50 x 0.0068 x 0.85) / 1000
Vd = 5.78 V

In this example, the voltage drop is 5.78 V, which is within the NEC’s recommended 5% limit but exceeds the 3% limit set by the Florida Building Code.

  1. Example 2: A single-phase circuit with the following parameters:
  2. Current (I): 15 A
  3. Wire Length (L): 30 m
  4. Wire Size: Aluminum, 4 mm²
  5. Power Factor (Pf): 0.90

Voltage drop calculation:
Vd = (I x L x R x Pf) / 1000
Vd = (15 x 30 x 0.0137 x 0.90) / 1000
Vd = 3.69 V

In this example, the voltage drop is 3.69 V, which is within both the NEC’s 5% recommendation and the Florida Building Code’s 3% mandate.

These examples demonstrate the importance of considering the various factors that contribute to voltage drop, such as wire material, cross-sectional area, length, and power factor, to ensure compliance with electrical codes and standards.

Conclusion

Voltage drop in single-phase circuits is a critical consideration in electrical system design. By understanding the factors that contribute to voltage drop and the methods for calculating it, electrical professionals can ensure that the voltage at the load is sufficient for the proper operation of devices, while also meeting the requirements of electrical codes and standards.

References

  1. Voltage Drop Calculation Question
  2. Voltage Drop: Definition & Calculation
  3. Measure Voltage Drop with No Load at All
  4. Southwire Voltage Drop Calculator

Why Does a Flip-Flop Have a Memory Feature? Exploring the Inner Workings

why does a flip flop have a memory feature exploring the inner workings

Flip-flops are fundamental building blocks in digital electronics, serving as the basic storage elements in sequential logic circuits. These circuits possess the unique ability to maintain and store a single bit of data, making them essential components in a wide range of electronic devices, from computers to communication systems. The memory feature of flip-flops is … Read more

Mastering the Art of Finding Parallel Resistance: A Comprehensive Guide

how to find parallel resistance

In the world of electrical circuits, understanding the concept of parallel resistance is crucial for designing, analyzing, and troubleshooting various electronic systems. This comprehensive guide will delve into the intricacies of finding parallel resistance, providing you with a step-by-step approach and a wealth of technical details to ensure you become a proficient practitioner in this field.

Understanding Parallel Resistance

Parallel resistance is a fundamental concept in electrical engineering, where multiple resistors are connected in a parallel configuration. In a parallel circuit, the current has multiple paths to flow through, and the total resistance of the circuit is always less than the resistance of the individual components.

The formula to calculate the equivalent resistance (Req) of a parallel circuit is:

1/Req = 1/R1 + 1/R2 + 1/R3 + … + 1/Rn

Where R1, R2, R3, …, Rn are the individual resistor values in the parallel circuit.

Calculating Parallel Resistance: Step-by-Step Approach

how to find parallel resistance

To find the parallel resistance of a circuit, follow these steps:

Step 1: Identify the Resistors in Parallel

The first step is to identify the resistors that are connected in parallel. This can be done by carefully examining the circuit diagram or the physical layout of the components.

Step 2: Determine the Individual Resistor Values

Once you have identified the resistors in parallel, you need to determine the individual resistance values. This information can be obtained from the circuit diagram, component datasheets, or by directly measuring the resistors using a multimeter.

Step 3: Apply the Parallel Resistance Formula

With the individual resistor values, you can now apply the parallel resistance formula to calculate the equivalent resistance of the circuit:

1/Req = 1/R1 + 1/R2 + 1/R3 + … + 1/Rn

Step 4: Simplify the Calculation

After applying the formula, you may need to simplify the calculation to arrive at the final equivalent resistance value. This may involve performing mathematical operations such as addition, subtraction, multiplication, and division.

Step 5: Verify the Result

Once you have calculated the equivalent resistance, it’s important to verify the result. You can do this by checking the calculated value against the expected or measured resistance of the circuit.

Examples and Case Studies

Let’s explore some practical examples to solidify your understanding of finding parallel resistance.

Example 1: Two Resistors in Parallel

Suppose you have two resistors, R1 = 20 Ω and R2 = 30 Ω, connected in parallel. To find the equivalent resistance, we can use the formula:

1/Req = 1/R1 + 1/R2
1/Req = 1/20 + 1/30
1/Req = 3/60 + 2/60
1/Req = 5/60
Req = 60/5 Ω
Req = 12 Ω

Therefore, the equivalent resistance of the parallel circuit with two resistors is 12 Ω.

Example 2: Three Resistors in Parallel

Now, let’s consider a parallel circuit with three resistors: R1 = 20 Ω, R2 = 30 Ω, and R3 = 30 Ω. To find the equivalent resistance, we can use the formula:

1/Req = 1/R1 + 1/R2 + 1/R3
1/Req = 1/20 + 1/30 + 1/30
1/Req = 3/60 + 2/60 + 2/60
1/Req = 7/60
Req = 60/7 Ω
Req ≈ 8.57 Ω

Therefore, the equivalent resistance of the parallel circuit with three resistors is approximately 8.57 Ω.

Example 3: Parallel Resistance with Varying Resistor Values

In this example, let’s consider a parallel circuit with four resistors: R1 = 10 Ω, R2 = 20 Ω, R3 = 30 Ω, and R4 = 40 Ω. To find the equivalent resistance, we can use the formula:

1/Req = 1/R1 + 1/R2 + 1/R3 + 1/R4
1/Req = 1/10 + 1/20 + 1/30 + 1/40
1/Req = 4/60 + 3/60 + 2/60 + 1.5/60
1/Req = 10.5/60
Req = 60/10.5 Ω
Req ≈ 5.71 Ω

Therefore, the equivalent resistance of the parallel circuit with four resistors of varying values is approximately 5.71 Ω.

Practical Applications and Considerations

Parallel resistance is widely used in various electronic circuits and systems, including:

  1. Power Supply Circuits: Parallel resistors are often used in power supply circuits to distribute the current load and ensure efficient power distribution.
  2. Sensor Networks: In sensor networks, parallel resistors are used to create voltage divider circuits for signal conditioning and processing.
  3. Lighting Systems: Parallel resistors are employed in lighting systems, such as LED arrays, to ensure uniform current distribution and prevent individual LEDs from burning out.
  4. Analog Circuits: Parallel resistors are used in analog circuits, such as amplifiers and filters, to provide feedback, load balancing, and impedance matching.
  5. Digital Circuits: Parallel resistors are used in digital circuits, such as pull-up or pull-down resistors, to ensure proper logic levels and prevent signal degradation.

When working with parallel resistance, it’s important to consider the following factors:

  1. Power Dissipation: In a parallel circuit, the power dissipated by each resistor is inversely proportional to its resistance value. Ensure that the resistors can handle the power dissipation without exceeding their rated limits.
  2. Tolerance and Accuracy: The tolerance and accuracy of the individual resistors can affect the overall equivalent resistance. Consider using resistors with tight tolerance specifications for critical applications.
  3. Temperature Effects: Resistor values can change with temperature, which can impact the equivalent resistance of the parallel circuit. Account for temperature variations in your design and analysis.
  4. Parallel Resistance in Series Circuits: When dealing with a combination of series and parallel circuits, the equivalent resistance of the parallel portion must be calculated first before determining the overall series resistance.

Conclusion

Mastering the art of finding parallel resistance is a crucial skill for any electronics engineer or technician. By following the step-by-step approach and understanding the underlying principles, you can confidently tackle a wide range of parallel resistance problems, from simple two-resistor circuits to more complex multi-resistor configurations.

Remember, the key to success in this field lies in your ability to apply the parallel resistance formula, simplify the calculations, and verify the results. With the examples and practical considerations provided in this guide, you are well on your way to becoming a proficient practitioner in the world of parallel resistance analysis.

Reference:

  1. Resistors in Parallel: Circuit Analysis with Parallel Resistance
  2. How to Calculate Series and Parallel Resistance
  3. Resistors in Parallel