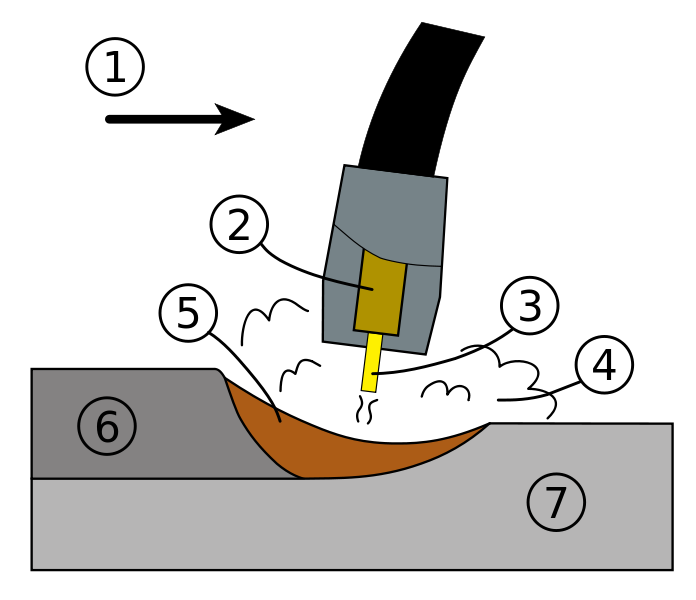
Fillet Weld is a continuous weld joint used to connect two metal pieces which are making an angle, in most of the cases a 90 degree angle to each other.
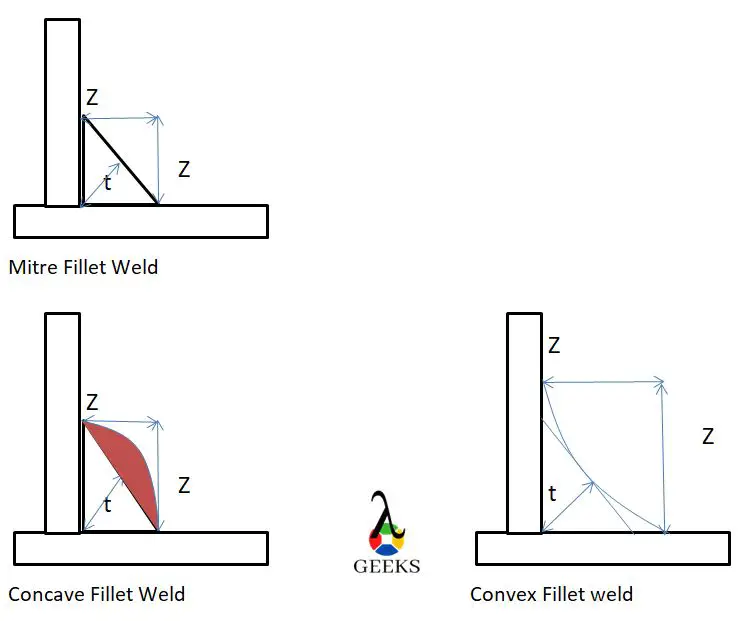
The Fillet welds may attain triangular, concave, convex or flat shape due to the influence of the welding technique. Most frequently used weld type in fabrication industries which covered a wide range(almost 70-80%) of joints prepared by arc welding method.
Non fusion processes like brazing and soldering are also used for fillet welded joint.
Fillet welds are seen as T joints where two metal pieces are connected to each other making a right angle and also seen as lap joints where one piece of metal overlap the other piece of metal.
What is a Fillet Weld?
A Fillet weld requires less edge preparation and has an almost triangular cross section.
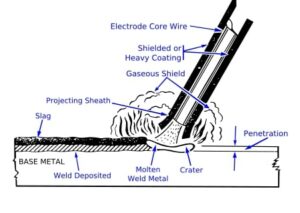
Fillet Weld is very cost effective as well as a simple joining method, that’s why one of the most widely used weld type in the fabrication industry. The different arc welding processes like metal arc, tungsten arc, shielded metal arc etc are adopted to get a fillet weld.

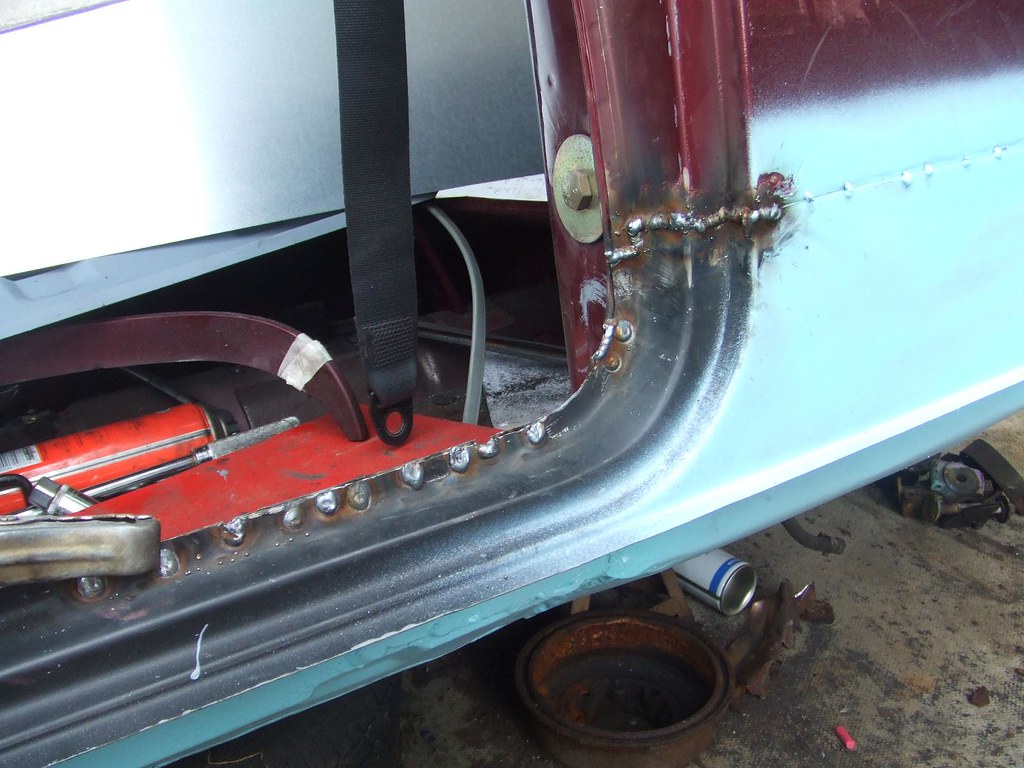
Fillet Weld example
In welding industry, fillet weld joint are most frequently used for different purposes.
Generally welders prefer fillet welds when want to connect flanges to pipes, welding cross sections of infrastructures and to replace bolts since they are not strong enough and having high chances of wear off.
Fillet Weld joint
Fillet Weld Joint occurs when two metal surfaces or other shapes are joined or welded to each other perpendicularly or at an angle.
Tee joint, lap joint, corner joint all are come under fillet weld joint. Fillet welds attain the appearance of a triangle, and depending on welder’s technique and different parameters, they can have concave, flat or convex surface.
The symbols also gives dimensions of the weld in different ways like leg length, length of the weld, spaces between the welds. The strength of the weld is also mentioned using a letter and a number combination just like E60.
Fillet Weld symbols
The basic symbol for Fillet Weld is in the shape of a triangle consisting of a reference line and an arrow and a tail.
The triangle lies either below or above the reference line, the arrow head always points towards the weld location. The tail is an optional element of the symbol which gives the in formations regarding the weld.
In ISO 2553,A system one continuous and one dashed line placing parallel to each other are used as reference line. If a symbol consists of a single reference line with a triangle above the line, it indicates the weld is going to be on the opposite side of the arrow.
If a joint consists of two fillets then an arrow with two triangles above and below the reference line is used for indication. For a continuous weld around the joint, then a small circle is placed around the junction point of the reference line and the arrow pointing to the joint.
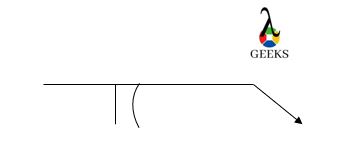
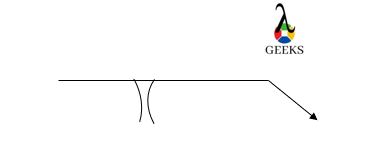
To describe the aesthetics of the weld, different symbols are there. For a concave shaped weld, a simple curve pointing away from the hypotenuse of the fillet triangle and for a convex weld a curve towards hypotenuse is used for representation.
Fillet Weld Parts
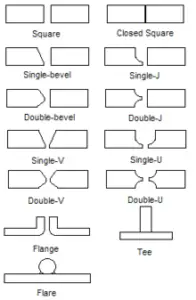
Commonly used joint designs for Fillet Welds are Tee Joint, Lap Joint and Corner Joint, in each of the joints the two surfaces at an right angle to each other.
The different parts of a fillet joint can be explained with the help of a figure below:
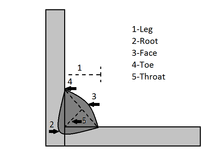
The parts of a Fillet weld can be seen in the above figure: Leg, Root, Face, Toe and Throat. The length (5) represents the throat thickness, distance between the centre point of the face surface of the fillet to the root of the fillet joint.
Throat thickness should be equal to the thickness of the metal piece to be welded. Using throat length, we can calculate the strength that can be withstand by a fillet joint.
The leg length(1) represents the two sides of the triangular fillet. To specify the size of a weld, leg length of the fillet is used. Face(3) gives the outer look of the weld, root(2) represents the deepest penetration part.
How to Measure Fillet Weld Size?
In a technical drawing, the symbol for Fillet might consist of weld dimensions.
We can define the weld size differently like the length of the weld, size of the legs, the measurement of the gap between the welds.
In a symbol, the size of the leg is placed in the left, for a fillet joint with unequal leg size we have to mentions both the dimensions like 1″ x 1.3″. On the other hand for a weld with equal leg sizes, single dimension is enough for representation.
In the right side of the fillet triangle we mention the length of the weld. In case of a double fillet the sizes are mentioned separately for both sides of the joint. If the fillet weld is not continuous, the length and pitch between centre of intermittent fillets are mentioned to the right of the symbol.
Fillet Weld Size Formula
Calculation of minimum and maximum Fillet weld size is necessary to endure the maximum stresses acting on a weld.
We always prefer an optimum value for a welded joint, an accurate calculation to get a correct fillet weld size is necessary. If a designer goes for a weld size above the optimum value, it does not add strength to the welded joint instead a hike in weld metal, man power and cost is observed.
To decide the leg length of a fillet weld always we have to remember that minimum leg size should be 3/4th of the plate thickness and for unequal plate thickness consider the thinner one.
Minimum Fillet weld size= 3/4th, t= fillet thickness, considering both side welded fillet joint with full length fillet weld. For only one side Fillet leg length should be doubled.
Effective Length of Fillet Weld
Site adaptability and ease of fabrication are the advantages which make a fillet joint abandon one One member overlaps the other therefore require less precision while fitting.
To calculate the effective length of the fillet we have to subtract two times the fillet size from the total length of the fillet weld.
Effective Length of Fillet, leff = l – 2 . Z
leff must have a minimum value of four times the weld size, leff > 4 . Z
The length of a weld shown in a diagram is considered as effective length of the weld and 2 . Z is the extra length provided by the welder.
Throat Thickness of Fillet Weld
The cross sectional of a fillet weld can be represented by a right angled triangle and, the perpendicular distance of the hypotenuse from the intersection point of legs is known as throat thickness.
The step by step method to calculate throat thickness is mentioned below:

In the above figure, for triangle ABC, Z= leg size or size of the weld
BD= throat thickness=t
Length of weld=l
The minimum area of the throat is obtained at the throat BD, which is given by product of t and Z.
Now t= z cos 450 Or 0.707 Z
Minimum area of the weld or throat area
A= throat thickness X length of weld=0.707 Z l
If σt is allowable tensile stress for the weld metal then the tensile strength of the joint for single fillet
P=Throat area x allowable tensile strength=
The joint with double fillet,
Fillet Weld design
Though Fillet joints are very common but different aspects are to be considered before producing such a weld.
The throat thickness and leg size should always be within a specific range for a perfect fillet weld.
It is little bit difficult to achieve the correct weld size maintaining required leg length and throat thickness. Generally designers allow a safety factor when calculating the size, therefore the weld size mentioned in a fabrication drawing is generally larger than the required design size

Fillet welds can be précised by two terms, Z= weld size or leg size and t= throat size.
Throat is the minimum cross section of the weld located at 450 to the leg size.
Now t= z cos 450 Or 0.707 Z
The size of a weld is specified by its leg size(Z).
A parallel Fillet Weld is subjected to shear failure at the throat section,
The strength of a single fillet weld is
Where l= length of the complete weld
= maximum permissible shear stress
P = load acting on the plates.
Transverse Fillet Weld
Fillet Joints are of two types: Transverse Joint and Parallel Joint. The main purpose of design a Transverse Fillet Joint is to withstand the tensile strength.
In Transverse Fillet weld the direction of weld is perpendicular to the direction of the force acting on the joint and in Parallel joint the direction of weld is parallel to the direction of the force acting on the joint. Transverse weld can be subdivided into single and double transverse fillet weld.
A single transverse joint may warp out of the shape from the edge which one is not welded, this is the main drawback of a single transverse fillet.In transverse Fillet Weld the load is considered as tensile because the load is perpendicular to the weld.
Load carrying capacity or strength of the weld is σt = F/A where
σt= tensile strength of the weld
F= Force the weld can handle
A=the effectivearea of the weld
The effective considering both the legs are equal, the theoretical throat will be z cos 450
Or 0.707 Z
For all fillet joints, area can be calculated by multiplying throat of the weld to length of leg(z) of the weld.
If σt is the allowable tensile stress of the weld material , then tensile strength of the single transverse fillet weld is
P= throat area x allowable tensile stress
P = 0. 707Z . l . σt
For double transverse fillet weld
P = 2 x 0. 707Z . l . σt
Fillet weld Vs Buttweld
The differences between Fillet and Butt welds are mentioned below:
| Fillet | Butt |
| Suitable for automatic welding situations. | Due to groove preparation before welding, automatic processes are not applied. |
| Abandon in welding industry due to no need of extensive joint preparation. | Sometimes avoided due to compulsory edge preparation. |
| Require higher heat input than the butt weld for same thickness of metal plate | Require lesser heat input than fillet joint for same metal thickness. |
Fillet Weld Size Formula
Distortion is a common disorder associated with welded joints, main reasons of distortion are thermal expansion and contraction of weld material and base material during welding.
Symmetrical weld reduces distortion but adaptation of symmetrical weld in each case is not possible. Over welding also causes distortion.
In European countries the technical drawings for a fillet joint mention the throat size and in UK generally leg size is mentioned. For a fillet weld with equal leg lengths, the cross-section triangle is a right-angle triangle with angles of 45 degrees in each corner.
The relation between throat size and leg size is mentioned below:
If\\tau is the allowable shear stress of the weld material , then shear strength of the single parallel fillet weld is
P= throat area x allowable shear stress=
For double parallel fillet weld
The tensile strength calculation formulae for transverse fillet weld are mentioned above (heading transverse fillet weld).
Generally, Fillets should be designed to withstand shearing stress. For a fillet joint with equal legs, the throat thickness is 0.707 times the leg size which gives a weld area equal to the throat dimension times the length of the weld.
How to use a Weld Fillet Gauge?
The two main uses of a Fillet Weld Gauge is to measure the leg length and to check the throat thickness.
Reading a Fillet Gauge is quite simple and very clear cut without any complexity. Each end of the gauge measures both leg length and throat thickness. The convex sides calculate the leg length and the sides with protrusions in the middleof a Welding Fillet Gauge calculate the throat thickness.
Depending on the type of fillet joint we have to decide the side of the gauge used to measure. Excessive convexity should always be avoided since the high convexity of a joint add to the stress risers and leads to crack and weld failures.
In the case of a concave weld, the weld size is measured using the side of the weld gauge where the center tab is required to touch the weld face. The thickness of deepest penetration part is difficult to measure since it is in the heat affected zone and difficult to define its extent precisely.
Conclusion:
To wrap up our post we can state that a thorough knowledge of fillet weld design is necessary for an Engineer. An appropriate weld symbol is necessary to represent the weld size. In UK, the leg length is specified by ‘Z’ in EN ISO 2553 and the number gives the weld size in millimeters.
