Important Selenium webdriver commands of 2021

Selenium Basic Commands 212x300 1

In this series of  tutorial we will learn about all the exhaustive selenium webdriver commands starting from the very basic selenium commands to the advance Selenium webdriver commands in the below order of articles : 

Basic Selenium Webdriver commands -Questions: 

Intermediate Selenium webdriver commands -Questions:

Advance Selenium WebDriver Commands -Questions:

Selenium basic commands- Answers: 

selenium webdriver commands
Selenium webdriver commands

Selenium navigate to url :

In Selenium Webdriver if we want to navigate or open any specific URL through our browser then we can do it in majorly two different approaches one is with the get() method and another one with navigate , we will take a look at how it could be done : 

public void getUrl(String url) {
  try {
     driver.get(url);
     BASE_LOGGER.info("Successfully navigated to the URL as :  " + url);
  } catch (Exception ex) {
     String exceptionData = ex.getCause().getMessage();
     BASE_LOGGER.error("Unable to navigate to URL  : " + url + " with the error as : " + exceptionData);
  }
}

The code you can write to navigate url is driver.get(“http://example.com”) whereas the driver is the Webdriver instance of the Selenium WebDriver interface.

visit here to understand how to launch all browser in Selenium.

How does the get method works internally in Selenium : 

Once this get() method gets called from your test script then Webdriver reference i.e. the driver will wait till the page is loaded , actually the get() method internally triggers onload function which returns the handle to your driver reference once the page is fully loaded.

Selenium navigate forward and navigate back :

Another approach to navigate to the url with the browser history is by using the navigate() method , where the Selenium uses the history of the browser to navigate forward or navigate back with you respective URLs such as : 

Selenium navigate forward

public void navigateForward() {
  try {
     driver.navigate().forward();
     BASE_LOGGER.info("Successfully navigated forward" );
  } catch (Exception ex) {
     String exceptionData = ex.getCause().getMessage();
     BASE_LOGGER.error("Unable to navigate with the error as : " + exceptionData);
  }
}

Selenium navigate Back : 

public void navigateBack() {
  try {
     driver.navigate().back();
     BASE_LOGGER.info("Successfully navigated Back to the URL ");
  } catch (Exception ex) {
     String exceptionData = ex.getCause().getMessage();
     BASE_LOGGER.error("Unable to navigate Back to URL  : with the error as : " + exceptionData);
  }
}


Selenium refresh page

We can use refresh() method from Selenium navigate 

public void seleniumRefreshPage() {
  try {
     driver.navigate().refresh();
     BASE_LOGGER.info("Successfully done the Selenium Refresh Page ");
  } catch (Exception ex) {
     String exceptionData = ex.getCause().getMessage();
     BASE_LOGGER.error("Unable to perform Selenium Refresh Page : with the error as : " + exceptionData);
  }
}

Selenium click

In order to perform any click operation with Selenium click we have to use method called click() in below approach , there are other ways to perform click operation on any of the WebElement in Selenium ie by using JavaScriptClick which is very useful sometimes depending on situations where your normal Selenium click method is working in a very stable manner , there are some cases where if you are automating with IE browser and  if the Web Application under test is build in some sort of bootstrap JS then normal selenium click method might not work sometime , in those case you could use Javascript click method .

public void safeClick(By element) {
  try {
      driver.findElement(element).click();
     BASE_LOGGER.info("Safeclick operation has been performed for the locator : " + String.valueOf(element));
  } catch (Exception e) {
     String exceptionData = e.getCause().getMessage();
     BASE_LOGGER.error("Error encountered i.e : " + exceptionData
           + " while performing Safeclick on the element : " + element);
  }
}

You can pass the element using different locator strategies(ie xpath, name, css etc) in the method called findElement() and then perform the click() method operation like above .

Selenium sendkeys

When we need to enter some text in some text box via Selenium we make use of the Selenium sendkeys() method by passing the “Text to be entered ” as the parameter in the method sendKeys(“Text to be entered”) and similar to the click() method this method is also applied to any webElement(here web text box) so we have to use driver.findElement to send the Text to that TextBox .

The Sample code goes like this : 

public void enterTextIntoElement(By element, String textToBeEntered) {
  try {
     driver.findElement(element).sendKeys(textToBeEntered);
     BASE_LOGGER.info(
           "enterTextIntoElement operation has been performed for the locator : " + String.valueOf(element));
  } catch (Exception ex) {
     String exceptionData = ex.getCause().getMessage();
     BASE_LOGGER.error("enterTextIntoElement operation has been failed for the locator : "
           + String.valueOf(element) + " with the exception i.e : " + exceptionData);
  }
}

Selenium clear text field

If we want to clear any data from a previously filled textfield, we can use the method called clear() and also by the help of Keys Class in Selenium we can do so , through which we can take the Keyboard Operations directly along with keyboard shortcuts :

To clear the Data with the help of clear() method we can write in the below approach: 

public void clearField(By element) {
  try {
     driver.findElement(element).clear();
     BASE_LOGGER.info("ClearField operation has been performed for the locator : " + String.valueOf(element));
  } catch (Exception e) {
     String exceptionData = e.getCause().getMessage();
     BASE_LOGGER.error("ClearField operation has been failed for the locator : " + String.valueOf(element)
           + " with the exception i.e : " + exceptionData);
  }
}

By using the Keys class we can also clear the Text fields in the following approach.

Selenium maximize window

While working with the Browser Automation if we have to Maximize the Window in Selenium then we could use the following approaches : 

Selenium Maximize Window by using Maximize() method :  

public void maximizeWindow() {
  try {
     driver.manage().window().maximize();
     BASE_LOGGER.info("Successfully Maximized the Window");
  } catch (Exception e) {
     BASE_LOGGER.info("Exception Occured while Maximizing the Window As : " + e.getCause().getMessage());
  }
}

Selenium Maximize Window by using ChromeOptions for ChromeBrowser:

By using the below method we are setting a chrome browser instance for Webdriver in maximized mode and the returned driver session will continue to the same feature(ie maximize window )for further web operation as per the script.

public WebDriver openBrowserInMaximizeWindow(){
  try {
     ChromeOptions options = new ChromeOptions();
     options.addArguments("start-maximized");
     WebDriver driver = new ChromeDriver(options);
    
  }catch(Exception e){
     BASE_LOGGER.error("Exception encountered with  : " + e.getCause().getMessage());
  }
  return driver;
}

Selenium minimize window

We can minimize the window using Selenium minimize() command with the following approach :  

public void minimizeWindow() {
  try {
     driver.manage().window().minimize();
     BASE_LOGGER.info("Successfully Minimized the Window");
  } catch (Exception e) {
     BASE_LOGGER.info("Exception Occured while Minimizing the Window As : " + e.getCause().getMessage());
  }
}

Selenium close browser:

To close the browser in Selenium we use close() method in the below approach : 

public void closeCurrentWindow() {
  try {
     if (null != driver) {
        driver.close();
        BASE_LOGGER.info("Successfully closed the current Window/Browser");
     } else {
        BASE_LOGGER.info("Unable to close the current Window/browser instance as Its NULL");
     }
  } catch (Exception e) {
     BASE_LOGGER.info("Exception occurred while closing the current Window/Browser");
  }
}

Selenium quit browser

To quit all the browser instances in Selenium we use quit() method in the below approach : 

public void quitBrowser() {
  try {
     if (null != driver) {
        driver.quit();
        BASE_LOGGER.info("Successfully QUIT Browser");
     } else {
        BASE_LOGGER.info("Unable to QUIT the Browser as Its NULL");
     }
  } catch (Exception e) {
     BASE_LOGGER.error("Exception occurred while QUITING Browser");
  }
}

Difference between driver.close() and driver.quit()in Selenium  :

Intermediate Selenium webdriver commands – Answers:

Dropdown in selenium:

In Webpage DOM structure, the dropdown is implemented by either Select or input Tage of HTML .To work with Dropdown with Selenium and perform certain 

web operations on the dropdowns, we need to use “Select” class from Selenium WebDrivers API as part of “org.openqa.selenium.support.ui” package from Selenium WebDriver. 

There are 2 different problem statement or ask while working with the Selection of DropDown in Selenium : 

Selection of single Element in a Dropdown at a time

In the below approach we can work with Dropdown:  

Step One :

You have to create a handle for the DropDown WebElement using Select class Object creation in the below manner :

Select select = new Select(WebElement webelement);

Step two : 

There are 3 different approaches to select the value from the dropdown in Selenium , we could use any of the below methods to select the value from dropdown in Selenium : 

Here is the below Approach we can take to select value from Dropdown : 

Dropdown in selenium- Approach One : 
In the Approach One you can use the text which is visible of the Desired Selection of the Webelement .

public void selectFromDropDownByText(By locator, String visibleText) {
  try {
     Select dropDownElement = new Select(driver.findElement(locator));
     dropDownElement.selectByVisibleText(visibleText);
     BASE_LOGGER.info("SelectFromDropDownByText operation has been performed for the locator : "
           + String.valueOf(locator));
  } catch (Exception e) {
     String exceptionData = e.getCause().getMessage();
     BASE_LOGGER.error("Error encountered i.e : " + exceptionData
           + " while performing selectFromDropDownByText on the element : " + locator);
 }
}

In the above method you can pass the locator of the dropdown and the visible text which you want to select from the dropdown then it will perform the desired operation is Selecting the expected dropdown element . 

Dropdown in selenium- Approach Two :

In this Approach you select the Webelement by using the value attribute  of the desired WebElement’s selection from the dropdown : 

public void selectFromDropDownByValue(By locator, String visibleText) {
  try {
     Select dropDownElement = new Select(driver.findElement(locator));
     dropDownElement.selectByValue(“Desired Webelement’s value ”);
     BASE_LOGGER.info("selectFromDropDownByValue operation has been performed for the locator : "
           + String.valueOf(locator));
  } catch (Exception e) {
     String exceptionData = e.getCause().getMessage();
     BASE_LOGGER.error("Error encountered i.e : " + exceptionData
           + " while performing selectFromDropDownByValue on the element : " + locator);
  }
}

In the above method you can pass the locator of the dropdown and the value attribute of the WebElement of which you want to select from the dropdown then it will perform the desired operation is Selecting the expected dropdown element . 

Dropdown in selenium- Approach Three :

In this Approach you select the Webelement by using the index(order of the WebElement in the HTML select tag )  of the desired WebElement’s selection from the dropdown, index generally starts from 0 :

public void selectFromDropDownByIndex(By locator, String visibleText) {
  try {
     Select dropDownElement = new Select(driver.findElement(locator));
     dropDownElement.selectByIndex(5);
     BASE_LOGGER.info("selectFromDropDownByIndex operation has been performed for the locator : "
           + String.valueOf(locator));
  } catch (Exception e) {
     String exceptionData = e.getCause().getMessage();
     BASE_LOGGER.error("Error encountered i.e : " + exceptionData
           + " while performing selectFromDropDownByIndex on the element : " + locator);
  }
}

In the above method you can pass the locator of the dropdown and index/order of the WebElement(in the Select Tag of the Dropdown ) of which you want to select from the dropdown then it will perform the desired operation is Selecting the expected dropdown element .

Selection of multiple Elements in a Dropdown at a time 

It depends on the HTML DOM structure and implementation whether any dropdown element is allowed to have multi selection of Elements . To select multiple elements in Selenium we have to follow below two steps : 

Step One : Check whether the DropDown WebElement allows the multi selection by using the method isMultiple() , this returns boolean as true or false.

Step Two : if the above step returns true then the dropdown allows multi selection .And after this we can use the above discussed any/all of the three different approaches to select multiple values and perform any desired operations ..

So to conclude here below is the sample code :

WebElement element =driver.findElement(By.xpath("XPATH OF THE DropDown"));
Select selectMultiple = new Select(element);
if(selectMultiple.isMultiple()){
   selectMultiple.selectByIndex(1);
   selectMultiple.selectByIndex(2);
//Similarly We could use other approaches/method for selecting dropdown elements such as selectByVisibleText or selectByValue
}

Drag and drop in selenium :

In the segment of tutorial we will learn all the different different approaches of performing Drag and Drop in Selenium such as : 

What is drag and drop in Selenium and where its used : 

Drag And Drop is a specific operation when users navigate to your web applications and try to perform operation(dragging by mouse move) on some webelement which can move freely over the application and can be dropped in some other location of the webpage of that application . 

Here the element which is being dragged is called a Source WebElement and the element where it’s being dropped is called a Destination WebElement . 

To Perform the above scenarios via Automation with Selenium we need to drag and drop functionalities provided by Selenium .

Different Approaches of Drag and Drop in Selenium :

Drag and Drop in Selenium using Build() method : 

How Build() method internally works :

build() method from the Actions class in Selenium which is part of the package org.openqa.selenium.interactions internally generates a composite actions 

by combining all the actions which have been called or triggered before calling the build() method.

For an example :

new Actions(driver).clickAndHold(sourceElement).moveToElement(destinationElement)
       .release(destinationElement).build();

The above statement to perform drag and drop operation build is being used to bind the previous actions such as clickAndHold, moveToElement and release methods.

Here is the below code snippet to perform the Drag and Drop in Selenium using build method of Actions class: 

public void dragAndDrop(By source, By destination) {
   try {
       WebElement sourceElement = driver.findElement(source);
       WebElement destinationElement = driver.findElement(destination);
       Actions builder = new Actions(driver);
       Action dragAndDrop = builder.clickAndHold(sourceElement).moveToElement(destinationElement)
               .release(destinationElement).build();
       dragAndDrop.perform();
       BASE_LOGGER.info("Successfully performed the Drag and Drop action ");
   } catch (Exception e) {
       String exceptionData = e.getCause().getMessage();
       BASE_LOGGER.error("Error encountered i.e : " + exceptionData + " while performing DragAndDrop ");
   }
}

Drag and Drop in Selenium using dragAndDrop() method :

How dragAndDrop() method internally works :

dragAndDrop(sourceWebElement,destinationWebElement) method basically takes two arguments one is source and another one is destination webelement. 
dragAndDrop removes the need of clickAndHold,moveToElement,release methods in Action class, it internally handles all the scenarios which are performed by these methods .

Here is the below code snippet for performing  dragAndDrop with the method dragAndDrop :

public void dragAndDropOps(By source, By destination) {
   try {
       WebElement sourceElement = driver.findElement(source);
       WebElement destinationElement = driver.findElement(destination);
       Actions builder = new Actions(driver);
       builder.dragAndDrop(sourceElement,destinationElement).perform();
       BASE_LOGGER.info("Successfully performed the Drag and Drop action ");
   } catch (Exception e) {
       String exceptionData = e.getCause().getMessage();
       BASE_LOGGER.error("Error encountered i.e : " + exceptionData + " while performing DragAndDrop ");
   }
}

Drag and Drop in Selenium using dragAndDropBy() method:

How dragAndDropBy(WebElement source, int xOffset, int yOffset) method internally works :

The method dragAndDropBy() takes 3 arguments which are : 

Source WebElement : the Element which is dragged ie the source element 

xOffset : horizontal move offset of the destination location 

yOffset : vertical move offset of the destination location 

Internally this method takes the source webelement and moves and releases it to the destination location. This method is useful if you want to move any source webelement to any pixel locations .

Below is the code snippet for the DragAndDropBy in Selenium :

public void dragAndDropByOps(By source, int xOffSet,int yOffSet) {
   try {
       WebElement sourceElement = driver.findElement(source);
       Actions builder = new Actions(driver);
       builder.dragAndDropBy(sourceElement,xOffSet,yOffSet).build().perform();
       BASE_LOGGER.info("Successfully performed the Drag and Drop action ");
   } catch (Exception e) {
       String exceptionData = e.getCause().getMessage();
       BASE_LOGGER.error("Error encountered i.e : " + exceptionData + " while performing DragAndDrop ");
   }
}

Visit here for the rest of the advanced sets of Intermediate Selenium webdriver commands.

Advance Selenium WebDriver Commands -Answers:

Double click in selenium :

To replicate the operation ie double click in Selenium via mouse we need to Perform double click via Actions class in Selenium  and we can do it in the below approach : 

public void doubleClick(By locator) {
   try {
       WebElement element = driver.findElement(locator);
       Actions actions = new Actions(driver);
       actions.doubleClick(element).perform();
       BASE_LOGGER.info("Performed the double Click on the Element  : " + locator);
   } catch (StaleElementReferenceException e) {
       BASE_LOGGER.error("Element is not attached to the page document " + e.getCause().getMessage());
   } catch (NoSuchElementException e) {
       BASE_LOGGER.error("Element " + locator + " was not found in DOM " + e.getCause().getMessage());
   } catch (Exception e) {
       BASE_LOGGER.error("Element " + locator + " was not clickable " + e.getCause().getMessage());
   }
}

The above code snippet is a method which basically takes an argument as Locator i.e. the WebElement on which the double click has to be performed.

Contextclick in selenium :

To replicate the context click or right click operation via mouse we need to Perform context click method via Actions class in Selenium  and we can do it in the below approach : 

public void rightClick(By locator) {
   try {
       WebElement element = driver.findElement(locator);
       Actions actions = new Actions(driver);
       actions.contextClick(element).perform();
       BASE_LOGGER.info("Performed the context Click on the Element  : " + locator);
   } catch (StaleElementReferenceException e) {
       BASE_LOGGER.error("Element is not attached to the page document " + e.getCause().getMessage());
   } catch (NoSuchElementException e) {
       BASE_LOGGER.error("Element " + locator + " was not found in DOM " + e.getCause().getMessage());
   } catch (Exception e) {
       BASE_LOGGER.error("Element " + locator + " was not clickable " + e.getCause().getMessage());
   }
}

For the detailed Advance Selenium webdriver commands visit here.. Also to get understanding of the Actions class in Selenium and its implementations visit here .

Critical FAQs : 

What is manage() in Selenium ?

driver.manage() returns an reference of implementation of WebDriver.Options Interface.Options interface is an interface for managing and handling actions in a browser menu such as : 

For exhaustive sets of Selenium interview Questions -Critical and Advanced sets visit here .

Conclusion :

In this section of the tutorial we covered the Basic Selenium webdriver commands , Click here to learn the Intermediate and Advance Selenium webdriver commands. To learn Selenium from Scratch click here .


71 UnAnswered Critical Selenium interview questions

Selenium interview Questions 1 212x300 1

In this tutorial of selenium interview questions, we will cover all the critical Selenium interview questions questions along with advanced Selenium Automation framework interview questions .This tutorial is divided into three segments :

Selenium Framework Interview Questions

Advance selenium interview questions

Intermediate selenium interview questions

NOTE : The focus of this Selenium interview Questions and Answers tutorial is to discuss most critical and complex questionnaire as you might already be aware of the basic questionnaires on .

Initially we will start with Advance Selenium Framework interview questions and answers and then move forward Critical/Advanced selenium interview questions and answers and then lastly we finish this tutorial with intermediate levels so that you can prepare well.

Selenium Interview Questions

Selenium Framework Interview Questions

Advance Selenium Interview Questions

Intermediate selenium interview questions

Selenium Framework Interview Questions : 

How many popular types of Selenium framework are there?

There are four different types of Selenium framework are there, which are : 

How many different approaches are there to design the Page Object Model framework?

What is Page factory in selenium ?

PageFactory is a class from Selenium library from a package called as org.openqa.selenium.support which helps to design the Page Object Design pattern in the Page Object Model framework, which has few implementations such as :

What is the key design difference between Classic Page Object Model and Customized Page Object Model?

So each webpage should have one interface to store locators and 1 class for the page level web operations and their respect assertions.

What is the design principle of the Page Object Model Framework?

The Design principle of the Page Object Model framework is based on principles or concepts, which are : 

So, All the page actions(different operations of the web page functionality)reside on the respective Page classes.

Mention the key differences among Page Object Model and the Hybrid Page Object Model?

The difference between Page Object Model and Hybrid Page Object Model is that the Hybrid Page Object Model is based on Page Object Model framework Design along with the extensive features of the Data-Driven Framework and supports a wide variety of the Data Operations Utilities such as below : 

What is the language Parser used in the Cucumber -BDD framework?

The language parser used in the Cucumber -BDD framework is Gherkin.

What is the Gherkin language?

Gherkin is DSL (Domain Specific Language) and English like language, which is very much readable and understandable (i.e., give(), when(),then(), etc.)

What do you mean by given() in Gherkin?

 Given () method states that some situation or scenario is given or stated.

 What do you mean by when() in Gherkin?

When () means when you perform some operations.

What do you mean by then() in Gherkin?

then() is used as assertions after the operations are performed by given().when() .

What CI tool do you use as part of the framework?

We use Jenkins (majorly) as an open-source CI tool.

What build tool do you use as part of the framework?

We use build tools such as Maven/Gradle/ant (it was previously used).

What is the key difference between maven and Gradle?

Gradle is the advanced version of what maven perform, and along with that, we can create tasks as well (like the feature that was available in ANT ), so we can consider on a high level : 

Gradle =>> Maven +Ant 

As part of Selenium C#, we use Gallio as a build tool. 

What’s the Unit Test framework that we use as part of the Selenium Automation framework?

We majorly use TestNG/JUnit(JUnit is less used nowadays) as part of the unit test framework while building the Automation framework with Selenium. 

As part of the Selenium C# framework, We use NUnit/MbUnit as a unit test framework.

What approach can be taken into consideration while designing the Reporting tools as part of the Selenium framework?

There is various reporting approach we could take while designing the framework :

Apart from these open-source reporting tools integration, we can also opt for some advanced reporting features or dashboard to build with the below technologies and tools :

How do you use ELK to build the reporting dashboard with Selenium Framework :

There is a basic base design principle which is being used to design the Automation dashboard, which are : 

How do you build an HTML customized report?

You can make use of different listeners and reporters interfaces provided by TestNg to record the events and their respective data sets and create HTML by using those data sets and the HTML tags in the report utils.

What are the challenges that you have faced while developing a framework?

There are different challenges you can mention as per your experience gives while developing the framework, for example : 

Mention which all Selenium components you have used in your Selenium Framework?

You can mention depending on your framework.

What is the flow of your Automation framework?

You can mention the flow of execution of your framework depending on your Framework flow and the tools that you have used; below is an example you can mention :

CI(Jenkins) → Build Tools (Maven/Gradle) → Unit Test Framework (TestNg) → TestNg.xml ->> TestClasses → BaseTest(Every Test Class extends Base class as baseTest where the @beforeClass /@BeforeSuite @afterClass etc exits )–>TestMethods → PageClasses→ Page Methods→ WebUtilities(reusable class for the WebAction utilities )–>> Reporting Utils 

What do you understand by Data-Driven framework, and where do we use a Data driven framework?

A Data-Driven framework is basically a framework that is driven by Data. Having said that, in which the application or the type of the application where the Same Test cases or scenarios is executed several times with the different data sets or the source or Data is very vast like in the case where we need to interact a variety of Data sources there we use Data-driven framework. 

The different Data Source can be : 

How to explain the selenium automation framework in an interview?

 There are different approaches you can take to explain the selenium automation framework in an interview; the best possible approach could be the modular approach, which is to break down the explanation into different separate modules, such as :

Let’s Discuss in Detail : 

Type of the Framework and Key and unique features of the Framework :

You need to mention the type of the framework such as Hybrid Framework, page object model framework, hybrid Page Object Model framework, etc. 

You need to mention the unique features of the framework, such as for example :

Tools and Technologies used in Selenium framework :

You can mention the tools and technologies used while developing the framework, such as :

The flow of the execution of the Selenium Framework :

You can mention the flow of the framework execution, i.e., how do you trigger the test suites and how it flows to the test cases/methods and till the Framework Utils such as webutils, data utils, etc. You can refer to the above question where we discussed how to explain the flow of the execution of the Selenium framework.

Different Critical Scenarios handled by your framework :

In this module, you can discuss the critical features that have been automated as part of your application automation with your framework. There can many use cases or features that you can mention here, such as : 

How to design logging scenarios in the Selenium framework?

You can use log4j for logging, or you can use real-time logging and debugging dashboard implementation with Graylog, which basically uses ElasticSearch in the backend for real-time logging and debugging details.

What are the design patterns you have used while designing the framework?

You can use different Design patterns as per the need and design of the Automation framework, such as :

Critical or Advance Selenium Interview Questions :

How many ways can you run your automation script parallelly?

There are multiple ways and approaches through which you can run your test scripts parallelly, such as : 

Maven :

Using surefire plugin : 

<forkCount>5</forkCount>

 <reuseForks>true</reuseForks>

Here fork count represents the number of parallel threads count.

Gradle : 

tasks.withType(Test) {
        maxParallelForks = Runtime.runtime.availableProcessors()
    }

What is the difference between setSpeed() and sleep() methods?

setSpeed() method in Selenium basically sets the speed of the execution of each and every action/command. 

So let’s say if you setSpeed(“2000”), then every line of execution will be delayed by 2000 milliseconds. 

On the other hand, Thread.sleep() will introduce a 3000 milliseconds delay (it will suspend the thread for the specific operation ). 

Hence sleep() is applied to 1 operation; on the other hand, setSpeed() introduces the delay for each and every operation and thus setting the speed of the execution.  

How to verify the presence of a ScrollBar with Selenium? 

To verify horizontal scroll bar in webpage with Selenium, we use Javascriptexecutor in the below manner : 

JavascriptExecutor javascriptExecutor = (JavascriptExecutor) driver;
Boolean presenceOfHorizontalScroll = (Boolean) javascriptExecutor.executeScript("return document.documentElement.scrollWidth>document.documentElement.clientWidth;");

To verify the vertical scroll bar in WebPage using Selenium webdriver also we need to use Javascriptexecutor

JavascriptExecutor javascriptExecutor = (JavascriptExecutor) driver;
Boolean presenceOfVerticalScroll  = (Boolean) javascriptExecutor.executeScript("return document.documentElement.scrollHeight>document.documentElement.clientHeight;");

Write the code to handle any hidden Web elements in selenium webdriver?

WebElement element=driver.findElement(By.id("id_of_Element"));
JavascriptExecutor jsExecutor = (JavascriptExecutor)driver;
jsExecutor.executeScript("arguments[0].click();", element);

Mention different approaches to handle a window based pop up using Selenium webdriver?

You can use the below approaches to handle Window based application such as window Pop up : 

What is the parent interface of WebDriver?

SearchContext

Mention the key differences between POI and JXL Jars?

POI supports Conditional formatting, rich text formatting, or xlsx format, but on the other hand, JXL does not support any of these features.

POI library is maintained and updated compared to JXL.

How do you handle your network latencies using Selenium?

We can use the following to handle network latency using in Selenium : 

Driver.manage.pageloadingtime

What are the approaches you would take to handle Ajax content testing with Selenium WebDriver?

AJAX is basically Asynchronous Javascript And XML. All the communication of the AJAX-based Application is based on asynchronous calls, 

which allow any event to be performed without refreshing the webpage. Each operation can be performed independently from other Events.

What are the challenges while working with AJAX calls in Selenium WebDriver?

To work with the AJAX application, you may need to use waits for the above-mentioned use cases : 

What’s the approach to work with Proxy in Selenium Webdriver?

There are two different Approaches you can handle proxy in Selenium Webdriver : 

Proxy proxy=new Proxy();
proxy.setHttpProxy("localhost:8889");
DesiredCapabilities capabilities=new DesiredCapabilities();
capabilities.setCapability(CapabilityType.PROXY, proxy);
WebDriver driver=new FirefoxDriver(capabilities);

Mention the ways to achieve synchronization in WebDriver?

We can handle synchronization in Selenium webdriver by using different wait mechanism : 

Mention the key differences between TestNg @BeforeTest and @BeforeMethod ? 

In TestNg @BeforeTest and @BeoreMethod has different aspects, are:

List the different types of WebDriver APIs present in Selenium?

How many ways you can achieve headless execution with Selenium?

We can use the below drivers to achieve headless automation with Selenium: 

What is Fluent Wait In Selenium WebDriver?

With FluentWait, you can set a maximum amount of time(let’s say 3 minutes ) to wait to meet a specific condition, and during that time, you will continuously poll or check with a certain frequency (very small unit of time, let’s say 3 secs )to check.

If the condition is met, then it will return true, and if not, it will throw an “ElementNotVisibleException” exception.

The syntax of fluentwait in Selenium is :

Wait fluentWait = new FluentWait(driver).withTimeout(100, TimeUnit.SECONDS)
  .pollingevery(2, TimeUnit.SECONDS)
  .ignoring(ElementNotVisibleException.class);

Tell us some Selenium exceptions that you have encountered while working with` Selenium WebDriver?

How do you delete cookies in Selenium?

The command to delete the cookies in Selenium is : 

driver.manage().deleteAllCookies();

Explain the approach that how do you read the javascript variable in selenium webdriver?

We need to use JavascriptExecutor to be able to do so. 

JavascriptExecutor jsExecutor = (JavascriptExecutor) webdriver;
String jsVariable = (String.valueOf(jsExecutor.executeScript("return document.title")));

How To Perform Zoom In And Zoom Out Browser operation In Selenium?

We can perform zoom in and zoom out operation in Selenium by using two different approaches, such as : 

Zoom in using Robot class in selenium

Robot robotInstance = new Robot();
//Zoom in

robotInstance.keyPress(KeyEvent.VK_CONTROL);
robotInstance.keyPress(KeyEvent.VK_ADD);
robotInstance.keyRelease(KeyEvent.VK_ADD);
robotInstance.keyRelease(KeyEvent.VK_CONTROL);

Zoom out using Robot class in selenium


Robot robotInstance = new Robot();
robotInstance.keyPress(KeyEvent.VK_CONTROL);
robotInstance.keyPress(KeyEvent.VK_SUBTRACT);
robotInstance.keyRelease(KeyEvent.VK_SUBTRACT);
robotInstance.keyRelease(KeyEvent.VK_CONTROL);

Zoom in using Keys class in selenium

driver.findElement(By.tagName("html")).sendKeys(Keys.chord(Keys.CONTROL,Keys.ADD));

Zoom out using Robot class in selenium

driver.findElement(By.tagName("html")).sendKeys(Keys.chord(Keys.CONTROL,Keys.SUBTRACT));

How to clear a field in selenium without using a clear() method?

We can clear any field without using the clear() method in the below approach : 

We can use the Keys class in Selenium to achieve the same : 

WebElement element = driver.findElement(By.id("id_of_Element"));
element.sendKeys(Keys.chord(Keys.CONTROL, "a"));
element.sendKeys(Keys.DELETE);

How to rerun the failed test cases in selenium?

We can rerun the failed test cases in Selenium in the below two approaches :

With auto-generated TestNG-failed.xml :

After the test execution (ran from testng.xml), TestNG automatically generates TestNG-failed.xml; you can rerun the same XML to run the failed tests ONLY.

By implementing IRetryAnalyzer interface from testNg :

By implementing the interface IRetryAnalyzer we can automatically rerun the failed test cases with TestNg :


If you implement the IRetryAnalyzer you can auto rerun  failed test with TestNg :

public class Retry implements IRetryAnalyzer {
   int counter = 1;
   int retryMaxLimit = 3;
   public boolean retry(ITestResult result) {
       if (counter < retryMaxLimit) {
           counter++;
           return true;
       }
       return false;
   }
}

How to Highlight Element in Selenium WebDriver?

We can use JavascriptExecutor to set the color of the Webelement by mentioning the element.


WebElement element = driver.findElement(By.xpath("id_of_the_element"));
JavascriptExecutor jsExecutor = (JavascriptExecutor) driver;
jsExecutor.executeScript("arguments[0].setAttribute('style', 'background: red; border: 2px solid red;');", element);

How to double click in selenium?

We can use the Actions class in Selenium to perform the DoubleClick operations in the below manner. The below method takes an argument on which you have to perform DoubleClick.

public void doubleClick(By locator) {
\t\ttry {
\t\t\tWebElement element = driver.findElement(locator);
\t\t\tActions actions = new Actions(driver).doubleClick(element);
\t\t\tBASE_LOGGER.info("Performed the double Click on the Element  : " + locator);
\t\t} catch (StaleElementReferenceException e) {
\t\t\tBASE_LOGGER.error("Element is not attached to the page document " + e.getCause().getMessage());
\t\t} catch (NoSuchElementException e) {
\t\t\tBASE_LOGGER.error("Element " + locator + " was not found in DOM " + e.getCause().getMessage());
\t\t} catch (Exception e) {
\t\t\tBASE_LOGGER.error("Element " + locator + " was not clickable " + e.getCause().getMessage());
\t\t}
\t}

How to scroll in selenium?

We need to use Javascript to perform the scrolling, and the below method provides an advanced approach to scroll into element till the element is visible, which is scroll into view : 

public void scrollIntoView(By locator) {

  try {
     JavascriptExecutor executor = (JavascriptExecutor) driver;
     WebElement element = driver.findElement(locator);
     executor.executeScript("arguments[0].scrollIntoView(true);", element);
     BASE_LOGGER
           .info("scrollIntoView operation has been performed for the locator : " + String.valueOf(element));
  } catch (Exception e) {
     String exceptionData = e.getCause().getMessage();
     BASE_LOGGER.error("Error encountered i.e : " + exceptionData
           + " while performing scrollIntoView on the element : " + locator);

  }

}

How to get all links on the page in selenium?

We can use By.tagName(“a”) to fetch all the links that are available on the page as link refers to the tag called as a; the method goes in the below manner : 

public List<WebElement> getAllLinks() {

  try {
     List<WebElement> allLinks = driver.findElements(By.tagName("a"));
     int numberOfLinks = allLinks.size();
     BASE_LOGGER.info("Number of Links in the Current Page is : " + numberOfLinks);
     BASE_LOGGER.info("GetAllLinks operation has been performed for the Current Page : ");
     return allLinks;
  } catch (Exception e) {
     String exceptionData = e.getCause().getMessage();
     BASE_LOGGER.error("Error encountered i.e : " + exceptionData
           + " while performing GetAllLinks for the Current Page :");
     return null;
  }

}

How to find the number of iframes on a page in Selenium?

We can use the below method to find the number of iframes in a page in Selenium :

public int numberOfIframesInPage() {
  try {
     JavascriptExecutor exe = (JavascriptExecutor) driver;
     Integer numberOfIFrames = Integer.parseInt(exe.executeScript("return window.length").toString());
     BASE_LOGGER.info("Number of IFrames in the current Window are : " + numberOfIFrames);
     return numberOfIFrames;

  } catch (Exception e) {
     BASE_LOGGER
           .error("Exception occurred in Finding numberOfIframesInPage with : " + e.getCause().getMessage());
     return 0;
  }

}

How to switch to default frame in selenium webdriver?

We can use switchTo().defaultContent() method to switch to default frame in Selenium Webdriver: 

public void switchToDefaultFrame() {
  try {
     driver.switchTo().defaultContent();
     BASE_LOGGER.info("Switched to Default Content ");
  } catch (Exception e) {
     BASE_LOGGER.error("Exception Occurred while switching to default Content ");
  }
}

How to handle tabs in selenium?

We can use a List to store all the tabs available and use driver.getWindowHandles() to store the tabs, and once after this, we can handle tabs one by one in the below approach, such as : 

public void switchToTab(int indexOfTab) {

  try {

     ArrayList<String> tabs = new ArrayList<String>(driver.getWindowHandles());
     driver.switchTo().window(tabs.get(indexOfTab));
     BASE_LOGGER.info("Successfully switched to tab with tab index as : " + indexOfTab);
  } catch (Exception e) {
     String exceptionData = e.getCause().getMessage();
     BASE_LOGGER.error(
           "Unable to Switch to Tab for :" + indexOfTab + " i.e failed with exception as : " + exceptionData);

  }


}

Intermediate selenium interview questions

Is WebDriver a class or an interface?

Webdriver is an interface where all the driver classes such as ChromeDriver, FirefoxDriver create an object and have reference to the Webdriver interface’s reference.

Which one is faster, XPath, or CSS?

CSS is faster than XPath. 

Why CSS is faster than XPath?

Every browser engine is different, and hence parsing strategy and engine implementation are different through the written XPath. That is why parsing XPath becomes inconsistent at times; for example, IE does not have its own engine implementation to parse XPATH; hence Selenium injects its own native XPath engine to parse XPATH in IE. 

What is heightened privileged browsers?

When the browsers are opened up with some predefined settings (instance with special privileged mode )such as with certain Profiles or Certificates, then it’s called heightened privileged browsers sessions. 

We can launch a browser with Selenium with Profiling or set certificates for the same purposes.

What is headless browser Selenium and how we perform headless browser testing?

  A headless browser is a simulation program for the browser where we don’t have a UI, but we still can run Application under test in invisible mode 

 and perform the desired web operation in the background.

 We use HeadLess browser drivers such as HTMLUNIT driver or phantomJS Driver to perform headless browser testing.

Selenium vs. puppeteer ? 

There are several differences between Selenium and puppeteer (which is a new tool compared to Selenium and developed by Google Chrome DEV)

We will discuss here the comparison between Selenium VS Puppeteer in different aspects : 

HardAssert vs SoftAssert ?

Both the assertion approaches are from TestNg, and each of them has its respective pros and cons

 When you are under the circumstances where you need to have an assertion that’s obvious, i.e., without that step, the remaining steps of the script do not make sense to be executed, then you can put Hard Assert there.

 How to set the window size in selenium?

We can create an object of Dimension class and pass that object to setSize() method : 

Dimension dimension = new Dimension(480,700);
driver.manage().window().setSize(dimension);

What is the version control system you use while working with Selenium?

You can mention whatever VCS you use, such as Github, SVN, etc.

How to clone a git repo?

We can clone the git repo by using :

Git clone repo

How to pull the Git repo code?

Git pull remoteRepoURL branchName

How to push the code to git repo?

Git push remoteURL branchName

How to set the Remote? 

git remote add ProvideARemoteName remoetURL

How to verify the available remotes?

Git remote -v 

How to check which remote URL you currently are in? 

git config --get remote.origin.url

How can you integrate your framework with Jenkins?

As part of the Selenium Automation framework, we are using build tools(such as Maven/Gradle), and we can create a Jenkins Job and connect the Maven/Gradle by providing the configuration with VCS (i.e., Github, etc.)

What are the disadvantages of Sikuli?

How to perform database testing using selenium?

We can perform database testing using selenium in the below modular approach : 

Here is below code snippet for the above steps : 

Selenium Database connection Setup with JAVA JDBC and creates a DB statement : 

   static Connection connection = null;
   private static Statement statement;
   public static String DataBase_URL = "DB_URL";
   public static String DataBase_USER = "DB_UserName";
   public static String DataBase_PASSWORD = "DB_password";


   /* This method Creates the connection with Java JDBC and return it to the Test method to use along with statement 
   */
@BeforeTest
   public void setUp() throws Exception {
       try{

           String dbClass = "com.mysql.cj.jdbc.Driver";
           Class.forName(dbClass).newInstance();
           Connection con = DriverManager.getConnection(DataBase_URL, DataBase_USER, DataBase_PASSWORD);
           statement = con.createStatement();
       }
       catch (Exception e)
       {
           e.getCause().getMessage().toString();

       }


   }

Use the statement to query the DB with SQL : 

@Test
public void test() {
   try{
       String queryData = "select * from TableName";

       ResultSet res = statement.executeQuery(queryData);
       while (res.next())
       {
           System.out.print(res.getString(1));
           System.out.print(" " + res.getString(2));
       }
   }
   catch(Exception e)
   {
       e.getMessage();
   }
}

Closing the Data Connection : 

This step is very important; otherwise, we may end up creating multiple database connections without closing them after the usage, which may cause several issues. 

Here is the code snippet for the same : 

@AfterTest
public void tearDown() throws Exception {

   if (connection != null) {
       connection.close();
   }
}

How to verify the background color and color of a WebElement using Selenium? 

We need to use a method called getCssValue(“color”) for retrieving the colour of a webelement and getCssValue(“background-color”) to pull the background colour of a webelement.

Here is the code snippet : 

String colour  = driver.findElement(By.xpath("XPATH_of_the_Element")).getCssValue("color");

String backgroundColour = driver.findElement(By.xpath("XPATH_of_the_Element")).getCssValue("background-color");

How to verify the font-size of a WebElement using Selenium webdriver? 

We can use the the method called getCssValue(“font-size”)

String fontSize  = driver.findElement(By.xpath("XPATH_of_the_Element")).getCssValue("font-size");

How to verify the font type of a webelement in Selenium Webdriver? 

String fontSize = driver.findElement(By.xpath("XPATH_of_the_Element")).getCssValue("font-type");

How to get tooltip text in selenium?

Getting tooltip text of a WebElement is nothing but getting the title attribute of the Webelement in the below manner : 

public String getToolTipData(By locator){

   WebElement element=driver.findElement(locator);
   return element.getAttribute("title");
}

What is StaleElementException? 

Stale Element means that when a Web element is no longer attached with the DOM/WebPage which was present previously. In that case, Selenium throws a staleelementexception.

This may happen for several multiple reasons like due to AJAX or JavaScript calls which changes the state

of the element makes it unavailable/detached from DOM.  

Conclusion : With these we are done with the Sets of Critical Selenium interview questions covering Selenium Framework interview questions , Read through here to get in depth concepts of Selenium to understand the architecture of Selenium.

Launching Browsers In Selenium- Facts You Should Know

In this segment of tutorial we will be learning how to do Selenium installation and also will be launching browsers in Selenium with hands-on such we will launch Firefox, Chrome, IE browsers and navigate to the Application URL (for an example we will launch www.Google.com to start with). 

In the previous section ie Module one of the tutorial we have learnt about Selenium Architecture , Selenium internal features and functionalities.

Selenium Installation: 

To Work with Selenium you have to undergo the following process , which are :

Install Java in the System: 

You can download updated version of JDK from Oracle.com, and install the Java in your system after downloading by following the steps.

Next step is you need to set the JAVA_HOME path from an environment variable (by copying the path of downloaded directories till bin folder)and also update the PATH variable of your system variables.

To validate whether the above steps are done properly go to command prompt and do java – version, it should show you the installed version of the JDK.

Setup IDE, i.e. Eclipse or Intellij:

You can choose your favourite IDE for coding the Automation scripts, Develop the Automation framework, etc., you can choose Eclipse or Intellij community edition for this purposes.

Download the Selenium Webdriver jar file from Selenium Dev.

Setup Selenium in the IDE (Eclipse)

Once you downloaded your favourite IDE, then open that (Eclipse or Idea ) and create a new Java project. Provide a name of the project and create package inside the newly created project, then create a Java class with a proper name (e.g. DemoTest.java, etc.).

Once the above steps are completed then you have to add the Selenium Jar that you have downloaded from Selenium DEV  in the Java Build Path Libraries in Eclipse to work with Selenium in the following way:

STEP 1—> Right-click on the Project, go to the properties option. Click on Java Build Path in the newly opened dialog box.

STEP 2 —> Click on the libraries option and then click on Add External Jars and select your Selenium JARs whichever you have download, in this way you can add any other externally downloaded JAR in your IDE workspace.

Launching Browsers In Selenium Webdriver:

With these above sections we are done the Selenium Installation or Setup process, now in the upcoming section, we will do hands-on Launching Browsers In Selenium with different browsers such as Firefox browser, Chrome Browser, IE browser, Safari Browsers etc. 

How to launch firefox browser in Selenium Webdriver:

To work with Firefox, you would require to download the GeckODriver which is basically the browserdriver for Firefox.

STEP 1 —> Download the geckodriver.exe file from GeckoDriver Github Release Page, while you download the file make sure you download the version based on on your Operating System.  

STEP 2 —> Set the driverbrowser path for geckodriver.

Code Snippets to Launch firefox browser in Selenium java

  System.setProperty("webdriver.gecko.driver", "pathToGeckoDriver exe");
  return new FirefoxDriver();

The above code is for returning the FirefoxDriver , if you want to launch the firefox driver .

Here is the below code in a public static void main format which launch the firefox browser using selenium and also navigate to the web-application under test.

public static void main(String[] args){
    System.setProperty("webdriver.gecko.driver", "pathToGeckoDriver exe");
    WebDriver driver=new FirefoxDriver();
    driver.get("Application URL");
}

How to launch chrome browser in selenium webdriver

Similarly to work with Chrome Browser with Selenium, you have to download the Chromedriver file and set the driver browser path from your script. 

System.setProperty("webdriver.chrome.driver","pathToDriver exe");
return new ChromeDriver();

Again the above code is for returning the ChromeDriver instance if you want to launch the Chrome browser with Selenium.

Here is the below code in a public static void main format which launch the Chrome browser using selenium and also navigate to the web-application under test.

public static void main(String[] args){
    System.setProperty("webdriver.chrome.driver", "pathToChromeDriver exe");
    WebDriver driver=new ChromeDriver();
    driver.get("Application URL");
}

How to launch ie in selenium Webdriver : 

Similarly to work with IE Browser with Selenium you have to download the IE file and set the driver browser path from your script.

Here is the below code snippet for launching IE browser in Selenium:

public static void main(String[] args){
    System.setProperty("webdriver.ie.driver", "pathToInternetExplorer Driver exe");
    WebDriver driver=new InternetExplorerDriver();
    driver.get("Application URL");
}

How to launch safari in selenium Webdriver:

To work with Safari Browser with Selenium you can follow the below code snippet . 

public static void main(String[] args){
    WebDriver driver =new SafariDriver();
    driver.get("Application URL");
}

How to launch edge browser in selenium : 

First Download the Edge Driver Exe file and set the path using System.setProperty like previously what we had done for other browser and then return the edge browser.

Here is the below code snippet for launching the Edge Browser in Selenium 

public static void main(String[] args){
    public static void main(String[] args){
        System.setProperty("webdriver.edge.driver", "pathToEdge Driver exe");
        WebDriver driver=new EdgeDriver();
        driver.get("Application URL");
    }
}

Conclusion: With this Section of the tutorial, we are have learnt how to install Selenium and Launching Browsers In Selenium and open with the Application URL.

Selenium Webdriver Architecture : Most Beginner’s Don’t Know

Blue Brown Photo Simple Flowcharts 300x225 1

We going to start with Selenium tutorial Blackbook in exhaustive and different approach , In this first segment of the Selenium tutorial, we will discuss aboutSelenium Webdriver Architecture, what is Selenium Webdriver , Selenium Webdriver overview, Brief History of Selenium,Advantages of Selenium,limitations of Selenium, Selenium components and some frequently asked questions .

What is Selenium Webdriver

Selenium is an open source technology or framework through which we can automate Web based Applications. Selenium Supports Multi browser Testing, Multiple languages like Java, Ruby, Perl, Python is also supported. It supports different multiple platforms like Windows, Linux, macOS etc. as part of the platform.

Brief History About Selenium :

Selenium was initially evolved from an internal tool by Jason Huggins in 2004 at ThoughtWorks.

Later in the year of 2007, Huggins joined the organization Google, and with others like Jennifer Bevan, he continued with the design and development of one of the initial variations of Selenium called Selenium RC. During a similar time period, another person named as Simon Stewart from ThoughtWorks developed an advance web browser automation tools as WebDriver. 

In 2008, a person named as Philippe Hanrigou from ThoughtWorks came up with remote Automation concepts known as “Selenium Grid”.

In 2009, at Google Test Automation Conference, it was decided to merge the two projects, and given the name as Selenium WebDriver, or Selenium 2.0.

Advantages of Selenium Webdriver :

A. Open Source :

Selenium is an open source technology/framework, hence huge community support is available where the development and improvement scope is rapid and vast, also as its open source you can implement any specific feature that you require as part of your work and contribute to the Open source community. 

B. Multi Programming Language supported :

Selenium is supported by widely used languages; it comes up with different programming language bindings, so you can choose your favourable language to work with selenium as per your need and expertise.

Selenium provides support for the below programming languages : 

  • Java 
  • C#
  • Perl
  • python
  • Ruby  
  • Javascript

C. Platform independent :

Selenium is platform-independent, so you can automate your web applications over any platform and any of the Operating System i.e. Windows, Linux, macOS etc.

D. Cross Browser Testing capability

Selenium supports cross browser Testing capability for your web applications; you can run your test suite written with Selenium in multiple browsers such as Firefox, Chrome, IE, Safari etc.

E. Cross Device Testing capability

Selenium Test Automation is used for mobile web application testing automation on various devices such as Android, IOS. 

F. Remote or cloud execution :

Selenium GRID provides you with the feature to run and control your web application’s automation test script in the cloud by making one system as the master node and other system as the slave node, slave nodes connect to one master node, and master node monitors the slave nodes, so your tests are in different slave nodes with the different operating system and different browsers such as Chrome, Firefox, Internet Explorer etc.

G. Parallel Testing capability:

With Selenium, you can achieve Automated Parallel testing capabilities, i.e. you can run your test script or automation Test cases into the different or same browser and different or same operating system in parallel. This feature helps you achieve lesser execution time for the whole Automation Test suite that you have, and also you can test your web application’s feasibility and compatibility with multiple operating system and multiple browsers in parallel.   

H. Compatibility with multiple Framework and third-party tools and technology

Selenium framework can be easily integrated with multiple various third party technologies and frameworks such as different Unit Test framework, i.e. TestNg, JUnit, MbUnit, Nunit etc. etc., different build Tools such as Ant, Maven, Gradle etc., continuous integration tools, i.e. Jenkins, different Test management tools such Jira, testlink etc., various reporting tools such as Allure, Extent Report etc.

I. Headless Browser execution : 

Selenium Webdriver supports headless browser driver for automated test case execution, where all your automation test cases run in headless browser mode, i.e. no browser gets opened and the execution becomes lightning fast so you can complete you Test scripts and the functionality quickly in case of urgent release and validations.

You can basically use htmlUnitdriver or ghost driver for the headless execution with Selenium.  

Disadvantages of Selenium :

  • Native/Window based App Support, not present : 
    • Selenium is used for Automating Web Bade application, but it does not provide support for native applications or windows based applications.
  • Exhaustive Image-based Automation: 
    • Selenium does not provide exhaustive support for automating image-based problems or applications, though we can use some third-party tools such as Sikuli, tesseract ocr based solutions which can be integrated with Selenium to do the job related to the Image validations/operations or image data extractions and validations, they are also having some limitations like you may face issues with Parallel testing, identifying handwritten document and validating those in the process of automating your application if there are such use cases.
  • Integration with third-party tools : 
    • One downside of the integration with multiple third-party tools with selenium is that your automation script might become slower at times.
  • Selenium framework Development :
    • Designing and developing an advance Test Automation framework with Selenium requires a lot of expertise on selenium and its not too straight forward to build an Automation framework with multiple tools along with Selenium.
  • Browser Specific issues: 
    • You may face some browser-specific issues while working with Selenium, especially with IE, sometimes you may not be able to handle Web actions like click, sendkeys etc., and the browser may become dead. Hence you need to have advance knowledge to handle those areas while automating Application built on Bootstrap JS and executing it on IE browser.
    • Also, you might face browser compatibility issues with the Selenium Webdriver versions; you need to make sure you are using the compatible Firefox, Chrome or any other browser you are working with Selenium Webdriver’s version.
  • No official support : 
    • Like any other Open Source tools selenium is also an open-source tool, which means you will not have official support for your problems like any Paid Tools, even though there is very large community support available, you can work with them with you problem statement, but that can be heavily time-consuming.

Selenium Components : 

Selenium as a tool has the below-mentioned components, which are : 

Selenium IDE :

  • Selenium IDE or Selenium Integrated Development environment is the most initial version of Selenium for Web Application Automation.
  • Selenium IDE is a kind of record and playback tool, which you can use as a plugin of the browser and record you web action your you applications and that can be saved as a script and later you can run the same recorded script to execute and do validations.
  • But it has few limitations such as :
    • You need to run the recorded script, modifying the script is not that flexible or neither you can deign you use case and scripts in you own independent approach.
    • Execution is very slow in nature.
    • Majorly supports Firefox, though there are some tweaks you can do to run the recorded script in other browsers such as Google Chrome.
    • parallel execution is not supported.
    • Mobile testing is not supported.
    • Report generation is quite not good.
  • Its actually very preliminary version of Selenium, by using this you can do very limited Test Automation for your Web Applications.

Selenium RC

  • Selenium Remote Control is the next version of Selenium and very often its referred to as Selenium 1.0.

How Selenium RC works internally :

Selenium RC consists of two major components, such as Selenium Server, Selenium Client.

The Selenium Server launches the browsers and runs the selenium commands that you have written as a test automation script by using Selenium client libraries available in different languages.

Selenium Server converts the commands/test scripts into something called Selenese commands, and it acts as an HTTP proxy.

Selenium Server interacts with Web Browser engine and performs the Web operation that you are trying to Automate as part of Test cases for the Application Under the Test.

Steps to use Selenium RC : 

  • Install the Selenium-RC Server.
    • Create a project using your choice of programming language and language specific to the browser driver.
  • Install selenium server
    • You can set up Selenium Server by simply just download the selenium-server.jar file and run it in your system by using the below command : 
    • java -jar selenium-server.jar
  • Write the Script by using Selenium client libraries and the same using the Selenium Server.

Limitations of Selenium RC :

  • In Selenium Remote control, automation driver and browser becomes a bit slower reason being browser engine is not directly interacted, rather Selenium RC injects javascript to the browser engine, it also referred to as Selenium Core.
  • The Server which has to be up and running before and during the test script execution.
  • Advance Web actions can not be automated and handled using Selenium RC such as mouse Movement, double click, taking input from Keyboard etc. etc. unlike Selenium Webdriver.
  • Selenium RC does not support Mobile app testing.
  • Selenium RC is dependent on the real browser to run the Automation testing script, and it does not support the headless browser such as HTMLUnitDriver or GHostDriver etc. unlike Selenium Webdriver.

Selenium WebDriver:

Selenium Webdriver is the advance version among the Selenium components which is very robust and also supports the advance version of Web interactions and also it does not interact with Browser via Javascript unlike Selenium RC and has the Mobile Application testing support as well. It’s very often referred to as part of Selenium 2.0.

WebDriver can handle dynamic elements and also supports parallel execution with multiple different browsers.

We will have a detailed discussion in the upcoming segments.

Selenium GRID : 

Selenium GRID is another component of Selenium through which you can have the remote execution of your automation testing script by creating master-slave nodes. Selenium GRID supports parallel Testing on the same browser as well as multiple browsers. 

We will have further discussion on Selenium GRID in the upcoming sections.

WebDriver 3.0

Selenium 3.0 is the latest version of Selenium components which is basically the combination of WebDriver 2.0 and evolution of GRID 3.

In this next segment, we are about to discuss the Selenium WebDriver Architecture in detail, and eventually, it depicts how Selenium works internally,.

Selenium Webdriver Architecture  :

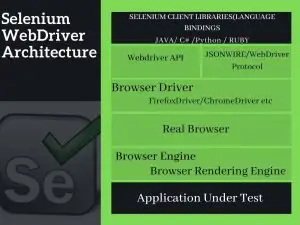
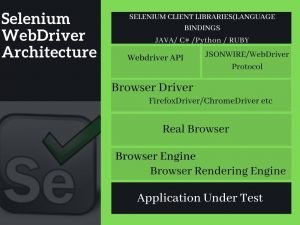
There five major attributes or components as part of Selenium Webdriver architecture : 


  • Selenium Client Library or Selenium-Programming language bindings
  • WebDriver protocol or JSON Wire Protocol over HTTP
  • Browser’s Drivers
  • Browsers Engine
  • Browser’s rendering Engine
Selenium Webdriver architecture
Selenium Tutorial-Selenium Webdriver architecture

Selenium Client Libraries or Programming Language Bindings: 

Selenium provides different language binding, i.e. the client libraries to support multiple different languages as part of your Automation Development and Automation test script. For example, Selenium with C#, Selenium with Java, Selenium with Python etc.

WebDriver Protocol or JSON WIRE PROTOCOL :

JSON which basically stands for JavaScript Object Notation. This protocol is also referred to as WebDriver protocol, used for server-client data transfer over the web. Each Browser Driver (e.g. FirefoxDriver, ChromeDriver etc.) has its own HTTP server and uses this protocol to transfer data via Rest Webservices in the form of the HTTP request and HTTP response.

 Browser Drivers:

Each browser has its own browser driver. The Browser drivers establish communication with the respective browser via browser engine. 

When the Automation script gets executed, it directly communicates to browser drivers and eventually with the respective browser. The request and response are transferred via HTTP request and HTTP response.

Browsers Engine :

Every Browser has its own browser engine; The browser engine basically works as an intermediary layer between UI and the rendering engine.

Browser Rendering engine : 

The Browser rendering engine is responsible for displaying the requested document by rendering the specific elements required for the request-response and data.

Selenium Webdriver Architecture and working functionality in a nutshell :

Selenium-WebDriver invokes the browser directly using each browser’s native support for automation and its JavaScript engine. How these calls are being made and the features that they support depend on the browser you are using.

It does not inject JavaScript like Selenium-RC when the browser loads.

The following incidence occurs while running the Webdriver script:

  •  We do the automation scripting using any language binding (Java / C # etc.), and it triggers the WebDriver API while the script is in execution.
  •   The script and eventually commands (eg driver.findElement (By.id (“idName”))) are being converted to JavaScript internally.
  •   Using Browser Engine, it is again converted back to JSON, which is kind of a key-value pair.
  •   After getting the respective value of the respective key, it identifies the respective WebElements and performs the respective user actions (like click, send keys, etc.).
  •   All communication is done using a JSON-Wire or Webdriver Protocol call, and the communications happen over HTTP in the form of Rest API as an HTTP request and HTTP response.

Selenium frequently asked Questions : 

What are the types of WebDriver APIs available in Selenium?

Selenium Webdriver is an interface and has different language bindings for different programming languages such as Java, C#, python etc., 

Selenium Webdriver is majorly having two different variants such as : 

  • Selenium Web driver local.
  • Selenium Web driver Remote. 

The Selenium Web driver Local uses the API to work with the specific language binding, and you can work with these with you local execution, while on the other hand if you want to execute you automation testing scripts in Remote, then you need to use the remote Selenium Web driver APIs.

Explain What are the scenarios we cannot automate using Selenium?

Selenium does not provide a way to Automate the below areas of aspects of the application, which are : 

  • Performance testing of the Application
  • Security Testing of the Applications.
  • Image-based processing and automation
  • Captcha based automation.
  • Video streaming Scenarios.
  • Native application or window-based applications.
  • Streaming Applications

Difference between Selenium 2.0 and Selenium 3.0?

  • For Selenium 2.0 minimum requirement is Java 1.7, on the other hand for Selenium 3.0, the minimum required Java version is 1.8
  • Selenium 3.0 requires GeckOdriver for Firefox version above 47, but this is not the case for Selenium 2.0 
  • Selenium 3.0 supports modern browser such as Edge, Safari etc. but on the other hand for Selenium 2.0, browser driver for Mozilla, Chromedriver, IE which is developed by Selenium developers.
  • In Selenium 3, the support for mobile automation testing got removed, i.e. AndroidDriver and iPhoneDriver, and you have to use tools like Appium for mobile automation testing, which is not the case for Selenium 2.0.
  • Selenium 3.0 doesn’t support the Headless driver, i.e. HTMLUnitWebDriver, but Selenium 2.0 has the support for Headless execution, i.e. with HTMLUnitDriver or ghostdriver.
  • Within Selenium 3, the Selenium WebDriver has become W3C standard; on the other hand, Selenium Webdriver in Selenium 2.0 does not belong to W3C standard.

Conclusion : With this we complete the first segment of Selenium tutorial blackbook covering What is Selenium , Selenium Webdriver Architecture,Selenium overview, Pros and cons of Selenium, In the upcoming segment of Selenium tutorial module 2 we will be discussing about Selenium Installation ie setup , Selenium commands and other basic,intermediate and advance topics of Selenium

43 TestNg Interview Questions :Most Beginner’s Don’t Know

TestNg ReTry 1024x747 1 300x219 1

In this tutorial we are going to discuss the exhaustive sets of Critical TestNg interview questions and answers and distributed depending on the difficulty level, where you can better equip yourself quickly on TestNg

These Sets of Testng interview questions are distributed in the following modules or set :

TestNg Interview Questions – Advance

TestNg Interview Questions – Intermediate

TestNg Interview Questions – Basic

Testng Interview Questions and Answers || Set 1

How do you exclude a group from the test execution cycle?

You can use exclude tag to exclude a group of test case from executing in the below manner in Testng xml file 

<groups>

    <run>

        <exclude name = “excludeDummy”>

        </exclude>

    </run>

</groups>

What are the types of reports generated in TestNG by default?

TestNG generates 4 kinds of reports after the execution, which are :

  • TestNG HTML report
  • TestNG Email-able report
  • TestNG Report XML
  • TestNg Failed XML report

Mention the difference between the TestNG test suite and the TestNG test?

TestNG test suite is the collection of test classes and test methods that can be run simultaneously as well as parallelly from the TestNG XML file. 

On the other hand, the TestNG test method is a single test case file or test method.

What is the use of threadPoolSize attribute with the @Test annotation 

Through The threadPoolSize attribute we can define a thread pool with the specific mentioned size by the number for the testmethod to be executed via multiple available threads.

The attribute is being ignored if the invocationCount is not being mentioned.

@Test(threadPoolSize = 3)
public void testCaseOne(){
System.out.println("testCaseOne in process");
}

In the above test method,testCaseOne will be invoked from the three different threads.

What does alwaysRun attributes do?

This alwaysRun annotation attribute is used whenever you want to execute the test method irrespective of the dependent parameters on which the test method depends, fails. If you set to true then you need to set the attribute is true.

What are the different listeners that are available?

  • ITestListener
  • IReporter 
  • ISuiteListener
  • IAnnotationTransformer 
  • IAnnotationTransformer2
  • IHookable 
  • IInvokedMethodListener 
  • IMethodInterceptor 

What is default value for the TestNG Priority?

The TestNG priority has the default value is zero.

How to re-run TestNg Failed Tests using Auto Retry mechanism ?

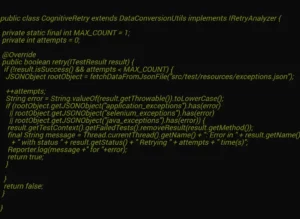
TestNg provides one interface called as IRetryAnalyzer listener which you can implement the interface auto re-run your Failed Test scripts by mentioning the class in the testNg.XML file , Here is the below code for implementing the same :

TestNg ReTry 1024x747 1
Testng interview questions and answers- TestNg Retry Test Script

In the above area you can configure the number of re-try ,maximum counts and also you can mention in which all exceptions you want to re-run Test scripts.

public class Retry implements IRetryAnalyzer {
    int retryCounter = 0;
    
    // The maximum number of failed execution 
    int autoRetryLimit = 2;
    @Override
    public boolean retry(ITestResult iTestResult) {
        if (retryCounter &lt; autoRetryLimit) {
            retryCounter++;
            return true;
        }
        return false;
    }
}

Approach Two : How to re-run TestNg Failed Tests using Auto Retry mechanism

In the below approach you can build 2 classes ie one is Retry class where you can keep the logic of controlling the number of iteration in case of test failures which will implement the interface Testng IRetryAnalyzer.

Another class is basically which will implement the another interface listener IAnnotationTransformer and implement the method transform which internally interacts with the previous class (ie Retry class)

public class Retry implements IRetryAnalyzer {
    int retryCounter = 0;
    
    // The maximum number of failed execution 
    int autoRetryLimit = 2;
    @Override
    public boolean retry(ITestResult iTestResult) {
        if (retryCounter &lt; autoRetryLimit) {
            retryCounter++;
            return true;
        }
        return false;
    }
}

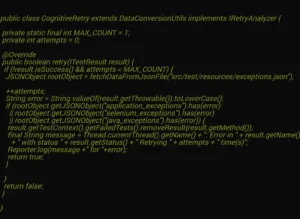
and finally add the CognitiveRetry class in the listener for testng.xml file .

<listeners>
    <listener class-name= "com.lambdageeks.cognitiveRetryUtils.CognitiveRetry"/>
</listeners>

How to achieve TestNG itestlistener implementation?

ITestListener is an interface in TestNg which has multiple methods(unimplemented since its an interface) which can be implemented by a class . Each method represents specific functionalities or scenarios , hence depending on your need you can implement those methods .

For an example onTestFailure is a method which you can implement where you want to perform any operations while any test method gets failed , lets say you want to capture the screenshot while in case of any test method failures , so you can write the takescreenshot method inside the onTestFailure , and as the ITestListener is an interface hence testNg will keep on listening on the events (test failures) and whenever there is test failures your screenshot will get captured .

Here is the implementation of capturing screenshot whenever you test script encounters a failures :

import org.apache.commons.io.FileUtils;
import org.openqa.selenium.OutputType;
import org.openqa.selenium.TakesScreenshot;
import org.openqa.selenium.WebDriver;
import org.testng.ITestContext;
import org.testng.ITestListener;
import org.testng.ITestResult;
import java.io.File;
import java.io.IOException;
import java.util.logging.Logger;
public class CustomListerners implements ITestListener {
    WebDriver driver=null;
    String filePath = "D:\\\\LambdaGeeks\\\\SCREENSHOTS";
    @Override
    public void onTestFailure(ITestResult result) {
        String testMethodName=String.valueOf(result.getName()).trim();
        ITestContext testContext = result.getTestContext();
        WebDriver driver = (WebDriver)testContext.getAttribute("driver");
        captureTheScreenShot(testMethodName, driver);
    }
    public void captureTheScreenShot(String methodName, WebDriver driver) {
        File scrFile = ((TakesScreenshot)driver).getScreenshotAs(OutputType.FILE);
        /*
        Each screenshots will get saved with along with the test Name to have better correlation
         */
        try {
            FileUtils.copyFile(scrFile, new File(filePath+methodName+".jpg"));
        } catch (IOException e) {
            e.printStackTrace();
        }
    }
    public void onFinish(ITestContext context) {}
    public void onTestStart(ITestResult result) {   }
    public void onTestSuccess(ITestResult result) {   }
    public void onTestSkipped(ITestResult result) {   }
    public void onTestFailedButWithinSuccessPercentage(ITestResult result) {   }
    public void onStart(ITestContext context) {   }
}

And also you need to add this class in listener tag in testng.xml file like we had done in previous question.

How to Implement testng iAnnotationtransformer ?

TestNg provides an interface named as IAnnotationTransformer that provides a method called  “transform” which you can implement and would be triggered in runtime by TestNG , this implementation is used to modify the test annotation behavior of the test class and test methods

In the below segment we would see how we could do that

public class TestClassAnnotations {
    @Test(alwaysRun = true,dependsOnMethods = "testMethodB")
    public void testMethodA() {
        System.out.println("--- Customizing the runtime behavious with ITestAnnotation ---");
    }
    @Test
    public void testMethodB() {
        System.out.println("--- Second TestMethods ---");
        Assert.fail();
    }
}

By default if we run the above code then only one method will get executed which is testMethodA and another method testMethodB will fail because we are intentionally failing this by usinig the Assert.fail() method.

But if we change the Alwaysrun=true annotation to false by using the IAnnotationTransformer then this method will not get executed , below is the code snippet on how to implement the IAnnotationTransformer and use it in the testing.xml to change the behavious of the TestNG annotation

The implementation of the CustomAnnotationTransformers goes here :

public class CustomAnnotationTransformers implements IAnnotationTransformer {
    public boolean isTestRunning(ITestAnnotation iTestAnnotation) {
        if (iTestAnnotation.getAlwaysRun()) {
            return true;
        }
        return false;
    }
    public void transform(ITestAnnotation annotations, Class testClasses, Constructor testConstructors, Method testMethods) {
        if (isTestRunning(annotations)) {
            annotations.setEnabled(false);
        }
    }
}

Here is the listener we need to add in testing.xml file

<listeners>
    <listener class-name= "com.lambdageeks.CustomAnnotationTransformers"/>
</listeners>

How to implement testng iinvokedmethodlistener?

If you want to implement a feature where a some certain method will gets executed before and after each and every Test method of TestNg then that feature could be implemented by the testng IInvokedMethodListener listener.


Here is the code snippet to implement the features :

package com.lambdageeks;
import org.testng.IInvokedMethod;
import org.testng.IInvokedMethodListener;
import org.testng.ITestResult;
public class CustomAnnotationTransformers implements IInvokedMethodListener {
    public void beforeInvocation(IInvokedMethod method, ITestResult testResult) {
        System.out.println(" ::: Before Method from IInvokedMethodListener is Triggered for the Test Method named as :  " + method.getTestMethod().getMethodName() + " ::: ");
    }
    public void afterInvocation(IInvokedMethod method, ITestResult testResult) {
        System.out.println(" :::: After Method from IInvokedMethodListener is Triggered for the Test Method named as :  " + method.getTestMethod().getMethodName() + " ::: ");
    }
}

Here is the Test Class for testing the feature :

public class TestClassAnnotations {
    @Test(alwaysRun = true)
    public void testMethoddummy() {
        System.out.println("--- This is a test Method , testing the feature of IInvokedMethodListener Testng Listener  ---");
    }
}

You have to Mention the TestNG iinvokedmethodlistener in the listener tag in the testng.xml like always

<listeners>
    <listener class-name="com.lambdageeks.CustomAnnotationTransformers"/>
</listeners>

The output of the execution would look like this :

::: Before Method from IInvokedMethodListener is Triggered for the Test Method named as :  testMethoddummy :::

— This is a test Method , testing the feature of IInvokedMethodListener Testng Listener  —

 :::: After Method from IInvokedMethodListener is Triggered for the Test Method named as :  testMethoddummy :::

How to implement Data providers in TestNG?

We can implement the DataProvider using TestNg in the below approach :

public class DataProviderDemo {
    @DataProvider(name = "dpName")
    public Object[][] dataProvidersMethodName() {
        return new Object[][]{{"Lambda"}, {"Geeks"}};
    }
    @Test(dataProvider = "dpName")
    public void dataproviderDummyTestMethod(String dataValues) {
        System.out.println("The Data Params with data provider examples : : " + dataValues);
    }
}

If we don’t set the priority of the test method in which order the tests are executed in TestNG?

The tests are executed in the order of Alphabatical order of the TestmethodName..


Such as in the below code snippet :

public class SequenceTest {
    @Test()
    public void geeks() {
        System.out.println("Sequence Test , Method ran :geeks ");
    }
    @Test()
    public void lambda() {
        System.out.println("Sequence Test , Method ran : lambda ");
    }
    @Test()
    public void abc() {
        System.out.println("Sequence Test , Method ran :abc");
    }
}

The output would look like this :

Sequence Test , Method ran :abc

Sequence Test , Method ran :geeks

Sequence Test , Method ran : lambda


How to run your Test scripts in parallel ?

You can run your Test scripts using TestNg XML file by mentioning the parallel=”methods” thread-count=”2″, here 2 parallel cases will get executed , if you want to executed more threads in parallel.

<suite name="DummyTest" parallel="methods" thread-count="2" >

<listeners>
<listener class-name="org.uncommons.reportng.HTMLReporter" />
<listener class-name="org.uncommons.reportng.JUnitXMLReporter" />
</listeners>
</suite>  

How to integrate TestNg with GRADLE build Tool?

You can run Testng Suite in gradle in different ways:

How to run TestNg Groups using Gradle : You can create a Task in build.gradle file can mention the useTestNG() and mention the below details while running the Test Groups.

TestNg Gradle
TestNg Interview Questions and Answers-TestNg with Gradle

How to run Testng Default listener with Gradle to generate report using TestNg library

TestNg Default listeners
TestNg Interview Questions and Answers- Testng With Gradle Default Listeners

If you want to use the custom listener then you can mention that same in the following approach :

Testng Gradle Custom listener 1024x497 1
TestNg Interview Questions and Answers-TestNG Custom Listeners with Gradle

How to run Testng Runner xml file using command prompt ?

You can use TestNg Downloaded location and mention org.testng.TestNg.testNgRunner.xml to run the runner xml file from the command prompt.

java -cp "/opt/testng-7.1.jar:bin" org.testng.TestNG testngRunner.xml

How to Integrate TestNg XML with Maven ?

You can integrate TestNg with Maven with the use of Plugin called maven-surefire-plugin where you can configure to run the testNgrunner.xml file using the configurations :

TestNG Maven Integration 1024x667 1
TestNg Interview Questions and Answers-TestNg-Maven-Surefire Integration

How can you specify the TestNg Test parameter using TestNg and Maven ?

You can specify the Test parameter using Maven SureFire Plugin with TestNg.XML file in the below fashion

TestNg Maven TestParameter 1024x543 1
TestNg Interview Questions and Answers-Test Parameter

Testng Interview Questions and Answers || Set 2

What is meant by invocationCount in TestNG?

invocationCount is a test annotation attribute by which you can define the number of iteration the test method will be executed in a single execution. 

 The above test will execute two times as invocationCount is mentioned as 2.

@Test(invocationCount = 2)
public void testOfInvCount() {
   System.out.println("Invocation count test in progress");
}

What are listeners in TestNG?

in TestNg the listeners are basically interface in Java which you need to implement in your class. The implemented class will keep on listening to certain events and executes the specific block of code associated with that event.Here when you implement the interface you ultimately implement the unimplemented methods and those block of code or the methods will get executed as and when specific event gets triggered. 

With the help of TestNG listeners, we can perform a lot of run time actions by listening to a different event triggered by the test script execution and their status, or we can do reporting. Also, we can change the implementation of TestNg annotation.

Mention the differences between @Factory and @Dataprovider annotations in TestNg?

@Dataprovider: When you want to execute the same test, but with different diverse sets of data in every run, you can use the dataprovider annotation, and this you can achieve the datadriven testing approach. Here the test method execution happens using the same class instance to which the test method belongs.

@Factory: This will be executed all the test methods present inside a test class using separate and multiple instances of the class.

How to use TestNG Reporter Class for the log generation?

You can log the details and data using the Reporter class, and these logs will be captured by the report generated by TestNG

Reporter.log(” Logging message “);

How to do exception handling in TestNG?

You can mention the type of expected exception in an attribute called expectedExceptions with the @test annotation; in this case, then TestNg would mark the test as passed.

@Test(expectedExceptions = numberFormatException.class)

How to achieve dependency injection via TestNg XML ?

TestNG allows us to inject dependencies between different groups of tests via the TestNG XML file. Through which we can have the dependence of one group onto another.

What are the various assertion approaches for TestNG ?

We can use two types of assertions with TestNg. 

Soft Asserts

Hard Asserts 

Mention some of the commonly used assertions with TestNG 

Some of the widely used assertion methods in TestNG :

  • assertEquals(boolean actual,boolean expected)
  • assertEqual(String actual,String expected)
  • assertEqual(String actual Result,String expected Result , String message)
  • assertTrue(condition)
  • assertFalse(condition)
  • assertFalse(condition, message)
  • assertTrue(condition, message)

What do you understand by the asserts in TestNG?

An assertion is performed to validate the actual test results with respect to the expected test results. In TestNg, we can use hard assert of soft assert. 

Difference between Hard assert and soft assert in TestNg

While working with the Hard assert, If in case we get any failure in the assertion condition then the subsequent test steps will not be executed and would be aborted, and eventually the test will be marked as a failed test case. 

While on the other hand the Soft Assert takes into considering of validating all the assertion points even if there are any failures in any of the assertions . That means the test execution does not get aborted even if one assertion fails.

How to write soft assertion in TestNg 

The below piece of code gives the approach of writing the soft assertion in TestNG

@Test
   public void assertion() {
   SoftAssert softAssertion = new SoftAssert();
   //Assertion 1 
   softAssertion.assertEquals("exp", "act");
   //Assertion 2 
   softAssertion.assertEquals(123, 123);
   //Assertion 3 
   softAssertion.assertEquals("actual Value", "expected value");
   // At the end considering all the assertion values
   softAssertion.assertAll();
}

How to use regular expression in TestNG groups?

A regular expression can be used in TestNG to execute the groups which have a similar pattern in their naming. 

For example, if you want to run all the groups starting with “testX” as per the name is concerned, then you can use the regular expression as testX.* in the TestNG XML file.

Testng Interview Questions and Answers || Set 3

What is TestNG?

TestNg basically represents “Testing Next Generation” is a unit testing framework that controls the flow and order of test automation and automation scripts by providing various annotations with their functionalities.

What are the advantages of TestNg?

  •             Through Testng’s various annotations, you can control the flow and order of automation and Test execution in a better approach.
  •             Test Classes or Test script Methods parallel execution can be achieved with TestNg.
  •            TestNg can be easily integrated with different build tools such as Maven, Gradle. Also, it can be integrated with CICD tools such as Jenkins.
  •            TestNG provide details HTML reporting feature and easily integrated with other Test reporting platform such as Allure, Extent Report with features of TestNG Listeners.
  •           All the tests can be triggered by the testng.xml file where you can mention the Test class/Test/Test Package name to be run.
  •           Data driven Testing can be done with the TestNg DataProvider annotation. Also, parameterization Tests can be done through Testng.xml as well, such as while performing cross browser testing, you can parameterize the different browsers for different tests. This feature helps to build the Data Driven Framework with TestNG.
  •          TestNg Provides a way to include/exclude a set of a test from tesngNg.xml with include and exclude attribute.
  •          With TestNg, you can group your tests and dependency injection in between the tests.
  •          TestNg provides many listeners with those you can achieve a lot of things like you can do custom reporting(IReporter), integration with different tools(ITestListener), Change the behavior of TestNG Test annotation in runtime with IAnnotationTransformer and many more.
  •         You can skip the specific test, prioritize your test order, create a time-bound test with TestNg Test annotations.
  •         You can use Hard Assertion as well as Soft Assertion with TestNg for writing Assert statement.
  •         TestNg generates TestNG-failed.xml after each Test execution, so you can you the same generated TestNG-failed.xml to rerun your failed test scripts.
  •        TestNg provides various Test annotation such as @BeforeMethod, @AfterMethod, @BeforeTest, @AfterTest.@BeforeSuite,@AfterSuite.
  •        You can run the expected exception Test with TestNg.
  •        You can rerun the failed test with IretryAnalyzer of Testng 

How do you trigger and execute the TestNg test Script?

You can run TestNg Test script in several ways : 

  •       Right Click on Test Class and “run as” and select the option of “TestNg Test.”
  •       Create testng.xml and right on the file and run the xml file.
  •       If you integrate testNg.xml with the build tool such as Maven/Gradle, then you can run from maven or Gradle as well.
  •       If the build tool such as Maven/Gradle is integrated with CICD, then you can run from CICD, i.e., from Jenkins.

State the Testng annotations that are available ?

Majorly used Testng Test annotations are :

  • @BeforeSuite
  • @AfterSuite
  • @BeforeTest
  • @AfterTest
  • @BeforeClass
  • @AfterClass
  • @BeforeMethod
  • @AfterMethod
  • @BeforeGroups
  • @AfterGroups
  • @Test

Mention the TestNg annotations execution sequence?

From the Test execution standpoint here is the below sequence for all the available TestNg annotations :

Precondition Annotations :

  • @BeforeSuite
  • @BeforeTest
  • @BeforeClass
  • @BeforeMethod
  • Test Annotations :
  • @Test
  • PostCondition Annotations: 
  • @AfterSuite
  • @AfterTest
  • @AfterClass
  • @AfterMethod

How to disable test execution for a test script?

You can use enabled attribute is equals to false in the @Test annotation attribute like mentioned below :

@Test(enabled = false)
public void logout(){
   System.out.println("Sample Test");
}

How can you specify listeners in TestNG xml?

You can use Tesng xml file for mentioning the listeners to be used as part the test script executions, in the below approach:

<suite>

<listeners>

        <listener class-name=”org.uncommons.reportng.HTMLReporter” />

        <listener class-name=”org.uncommons.reportng.JUnitXMLReporter” />

</listeners>

What is the Timeout Test in TestNg?

In this case, the “timeout test” means, if in case the test script takes longer than the specified time period to execute, then testng will abort the test and will mark as a failed test.

@Test(timeOut = 6000) // this time in mulliseconds
public void testShouldPass() throws InterruptedException {
   Thread.sleep(2000);
}

How to achieve the Expected Exception Test with TestNG?

If a Test method throws an exception, which is the same as specified as part of the test annotation expectedExceptions attribute, then TestNg would mark the test as passed.

@Test(expectedExceptions = ArithmeticException.class)
public void TestDivision() {
   int i = 1 / 0;
}

 The above Test method will be passed as it throws the exception expected by TestNG.

What is the difference between @BeforeTest and @BeforeMethod annotation?

@BeforeTest is executed once before each of the testng <test> tag mentioned in the testng.xml file 

@BeforeMethod is executed before each and every test script method.

What is the advantage of using the testng.xml file?

With the testng.xml file, you can control the flow of execution with single test suite or multiple test suite in a single testng xml file. Some of the important features are :

  • testng.xml file allows us to exclude and include test methods and test group execution.
  • You can pass test data/parameters through testng.xml.
  • You can add dependency between test methods and also a group of test methods
  • You can prioritize the test cases.
  • Parallel test execution of test cases is achieved.
  • You can implement different testng listeners and use them by mentioning those in the testng.xml.
  • If you run your suite with testng.xml, then you will only fail the test for the next iteration by using TestNG-failed.xml is generated after every execution.
  • You can run specific groups of tests using <groups>tag of TestNG xml.

How many types of dependencies can you achieve by using TestNG?

There are two types of dependencies we can achieve with TestNG : 

A. DependsOnMethods : 

By using this dependsOnMethods attribute, you are defining which test method will be dependent on other test methods, So if the depending method is failed or not run, then the dependent test method also will not run.

@Test
public void loginUserProfile() {
   System.out.println("Login user ");
}
@Test(dependsOnMethods = "loginUserProfile")
public void logOutPage_user() {
   System.out.println("Logout page for User");
}

 Here is logOutPage_user test method that will run after the successful execution of the loginUserProfile test.

B. dependsOnGroups : 

In this type of test dependency, It allows us to put the dependency injection for the test methods with a group of test methods.

The flow of execution happens in such a way ie the testGroup first gets triggered and executed and then the dependent test method gets triggered, and once after successful completion of the group test, the dependent test method will get executed.

@Test(groups="AtestGroupName")
public void testcaseOne()
{
   System.out.println("testcaseOne in process");
}
@Test(groups="AtestGroupName")
public void testcaseTwo()
{
   System.out.println("testcaseTwo in process");
}
@Test(dependsOnGroups="AtestGroupName")
public void testcaseThree()
{
   System.out.println("testcaseThree in process");
}

Conclusion : With this we conclude the list of all critical and important TestNg interview questions and answers , to get better grip on TestNg you can go through the exhaustive documentation on TestNg.

To learn more about the exhaustive Selenium tutorial you can visit here.

Mobile Cloud Computing And It’s Evolution(You Must Know!)

What is Mobile Computing

Mobile Computing is one of the latest and evolving technologies that allows data transmission in the form voice, images, videos via internet-enabled or rather wireless-enabled devices without physical connection such as computers, IoT devices, etc.

Mobile Computing Components

The significant verticals of components involved in the technology of Mobile Computing or Mobile cloud computing are :

  • hardware components
  • software component
  • Communication layer

Hardware Components

The hardware components have different types, such as device components or mobile devices that provide the service of mobility. They can be classified in various segments like smartphones, portable laptops, IoT devices, tablet Pc’s, etc.

What role the hardware components play :

These hardware devices have a mini component called a receptor capable of sensing, receiving, and sending data signals. It is configured to operate in full-duplex mode, ie, sending and receiving signals at the same point of time.

Receptors operate on an existing established wireless network.

software component

The mobile component is the software application program, runs on the mobile hardware component. It is the operating system of the device.

This component ensures portability and mobility and operates on wireless communications and ensures computation that are distributed locations and not attached to any single physical location.

Mobile Communication Layer :

The communication layer represents the underlying infrastructure to ensures seamless and reliable communication. This consists of factors like protocols, services, bandwidth, and portals required to facilitate and support. This layer is based on the radio wave. The signals are carried through the air and communicate with receptors through software components.

The data format is also defined at this layer to ensures collision-free communication between existing systems that provide the same service.

History Of Mobile Computing

During the period of the 1980s:

In 1981: The Osborne Computer Corporation releases the world’s first consumer laptop, The Osborne 1, even though its main limitation was with its display pf 52 characters per line of texts with a small 5″ screen.

mobile computing

Then in 1982: HX-20 from Epson, a portable computer with a small 120 x 32 resolution monochrome LCD screen.

mobile cloud computing

In 1984: The first touchscreen system was developed on the Gavilan SC, which is the first to be marketed with the term ‘laptop.’

multiplexing in mobile computing

In 1989:The Apple Macintosh portable is one of the first to feature an active matrix 640 x 400 screen. This is Apple’s first contribution to the mobile computing movement.

history of mobile computing

During the period of 1990s:

1990: The Intel announces its 20MHz 386SL processor, and was the first CPU to be explicitly designed with mobile computing in mind, featuring power management features and sleep modes to conserve battery life.

1992: The Windows 3.1.1 is released, and then it becomes the standard operating system for laptops

UUXjFePW3tuK8Pk2dOm p5DS9dYLIoIVxmw1d2slCFu8Ghe6ruONIHTJC3t98ZCx7CTPhBrL4UYN4cR IPud7Maz48kuA4ganfKHooaDb4ih

1993: Personal digital assistant was introduced to the United States by Apple.

cnD3FSH8jQdkJsGKZYCeHmTr0cPyx4o UFtmzFmjn0klt vt8iByEgeGF9EAMwdJ loquPPRgpnpZGGQv70HkVTzzUguiTGAj6Ms1Fhj4frab1B1sQP6b1atwPIEkI52HY4GlQgl

1994: IBM’s Thinkpad 755 introduced the CD-ROM drive.

MDk FWs3z1js6YPyaGALb0n2MK3k8HpE6IVwOREdGPjUAv sAeBRG ce4ptg5TkW7AYfL5renQaTzVauaUSds EQIlm96dHosurC1U5n2MkgTDpDEHpcBRrz2J m5oLuZzbrr2iB

During the period of the 2000s and beyond:

2000: Microsoft unveils a new Operating System, which sparks the beginning of the Pocket PC era. 

image 281

2002: The Research in Motion introduces the first BlackBerry smartphone. 

2007:

  • The Apple launched its first iPhone, which integrated with the best Web-browsing experience and along with the touchscreen display

Also, that time Google unveils Android.

2009: The Motorola introduces the Droid, which was the first Android-based smartphone.

2010:

  • Apple launches the iPad, a line of tablets designed, developed, primarily as a platform for audio-visual media, including books, periodicals, movies, music, games, and web content.
  • Samsung released the Galaxy Tab, an Android-based tablet to compete with the Apple iPad.

With this path, mobile computing evolved, and there were other inventions and contributions that were done from multiple different organizations from the time it started around 1980 and till now. We still see tremendous development is these areas, and this way, mobile computing will continue its path of revolution.

Mobile Computing – Classification

Mobile computing is widely distributed in different sorts of devices that support mobile computing. It is not only limited to computer or mobile phones, as we saw in the history of Mobile computing

We can classify these mobile computing devices in the below segments :

Personal Digital Assistant (PDA)

The Personal Digital Assistant ie, PDA, is an extension or a module of the PC, not a substitute, and mainly used as an electronic organizer. This kind of device is capable of sharing data with computer systems through a process called synchronization.

In this process, both the devices will access and communicate with each other to check for any updates in the individual devices by using Bluetooth or infrared connectivity.

With PDA devices, users can access audio clips, video clips, update office documents, and many more services using internet connectivity.

Smartphones

Smartphones are a combination of PDA and Phone with the camera and other features like the execution of multiple programs concurrently.

The majorly used mobile Operating Systems (OS) are Google’s Android, Apple IOS, Nokia Symbion, RIM’s BlackBerry OS, etc.

Tablet and iPads

This kind of device is larger than a mobile phone or a PDA and also integrates touch screen and is operated using touch-sensitive motions on the net. Eg. iPad, Galaxy Tabs, Blackberry Playbooks, etc.

They provide the same functionality as portable computers and also supports mobile computing in a far superior manner and have the huge processing power.

Multiplexing in mobile computing

  • Multiplexing is a process where multiple simultaneous digital or analog signals are transmitted across a single data link channel.

It can further be distributed into four types. These are:

  • A. Space division multiplexing or SDM
  • Time-division multiplexing or TDM
  • Frequency division multiplexing or FDM
  • Code division multiplexing or CDM

Multiplexing: Frequency division multiplexing (FDM ):

  • In Frequency Division multiplexing, the frequency spectrum is diversified into smaller frequency bands. Through FDM, a number of frequency bands can work simultaneously without any time constraint.

 Advantages of FDM

  • This process is applicable to both analog signals as well as digital signals.
  • The simultaneous dimension of the signal transmission feature.

Disadvantages of FDM

  • The probability of Bandwidth wastage is high and having Less Flexibility.

Multiplexing: Time Division Multiplexing(TDM)

  • The Time Division approach is basically utilizing the whole spectrum for a period.

Advantages of TDM

  • The dedicated user at a certain point in time.
  • Flexible and less complex architecture.

E.g., Integrated Service for Digital Network telephonic service.

Multiplexing : Code Division Multiplexing(CDM)

  • In CDM techniques, a unique code is reserved for every channel so that each of these channels can use the same spectrum simultaneously at the same point in time.

Advantages of CDM

  • Highly Efficient.

Disadvantages of CDM

  • The data transmission rate is less.

Eg. : Cell Phone Spectrum Technology(2G, 3G, etc.).

Multiplexing: Space Division Multiplexing(SDM)

  • Space Division can be considered having both FDM and TDM properties. In SDM, a particular channel will be used against a certain frequency band for a certain amount of time.

Advantages of SDM

  • High Data transmission rate with the optimal Use of Frequency & time bands.

Disadvantages of SDM

  • High inference losses.

E.g., Global Service For Mobile or GSM Technology.

Mobile Cloud Computing

MCC or Mobile cloud computing utilizes cloud computing to deliver and integrate applications to mobile devices.

Using this Mobile Cloud Computing techniques, the mobile apps can be deployed remotely using speed and flexibility and by using the series of development tools.

Mobile cloud applications can be built or updated, and also the addition of a new feature to the exiting application could be achieved in a quick manner and efficiently using cloud services.

These mobile apps can be delivered to as many different devices having different operating systems, computing tasks, and data storage mechanism.

These apps in this approach require lesser device resources because they are cloud-supported architecture, and also the reliability gets improved due to the fact that the data gets backed up and stored over the cloud, which also, in turn, provides more security and robustness.

Advantages of Mobile Cloud computing :

Mobile applications which are being built based on this cloud architecture acquire the following advantages:

  • Data storage capacity and processing power enhancement.
  • Extended battery life
  • Better synchronization of data due to “store in the cloud, access it from anywhere” methodology.
  • Improved reliability and scalability and security due to safe cloud infrastructure and replicas.
  • Easy Integration

Ref: https://www.cs.odu.edu/

Important Guide For Rest API Testing & RestAssured

RestAssured 1 212x300 1

In this exhaustive Rest Assured tutorial we are going to learn the Rest API Testing in depth, API Test Automation along with Rest Assured in modularised approach

What is RestAssured and its use

Rest Assured is a very widely used open source technology for REST API Automation Testing , this is based on java based library.

Rest Assured interacts with Rest API in a headless client mode, we can enhance the same request by adding different layers to form the request and create HTTP request via different HTTPS verbs to the server .

Rest Assured built in library provides enormous methods and utilities to perform the validation of the response received from the server such as status message, status code and response body .

This complete series of Rest Assured Tutorial for REST API Automation Testing consists of the following topics :

RestAssured -The rest assured tutorial api testing
Rest Assured API Automation

Getting started: Configuration of restAssured with Build tool ie Maven/gradle

STEP 1 : If you are working with maven just add the following dependency in pom.xml (you can choose any other version as well):

To get started with REST Assured, just add the dependency to your project. 

<dependency>
    <groupId>io.rest-assured</groupId>
    <artifactId>rest-assured</artifactId>
    <version>4.3.0</version>
    <scope>test</scope>
</dependency>

If you are working with gradle just add the following in build.gradle (again you can choose any other version as well):

testCompile group: 'io.rest-assured', name: 'rest-assured', version: '4.3.0'

STEP 2 : REST Assured can be integrated and used very easily with the existing unit test frameworks ie Testng,JUnit

Here we are using testNg as per the Unit Test Framework is concerned.

Once the libraries of Rest Assured is imported then we need to add the following static imports to our test classes:

import static io.restassured.RestAssured.*;

import static org.hamcrest.Matchers.*;

NOTE : For this upcoming learning purpose , we’ll test the Ergast Developer API, which can be found here. This API provides historical data related to Formula 1 races, drivers, circuits, etc .

Familiarity with the Syntax:

Rest Assured is supports BDD format(Gherkin Syntax) to write the test scripts ie in Given/When/Then/And format ,We are assuming that you have understanding on BDD/gherkin syntax , if not then we would suggest to spend 30 minutes of time to understand what is BDD(Gherkin Syntax) and how does it work and its very basic .

T-01 : Our 1st script which is basically validating number of circuits in F1 in 2017 using this API (http://ergast.com/api/f1/2017/circuits.json)

@Test(description = "Number Of Circuits In 2017 Season Should Be 20")
public void validatingNumberOfCircuits() {
   given().when().get("http://ergast.com/api/f1/2017/circuits.json").
           then().assertThat().body("MRData.CircuitTable.Circuits.circuitId", hasSize(20));
}

Rest API response validation :

1. Captures JSON response of the API request.

2. Queries for circuitId using GPath expression “MRData.CircuitTable.Circuits.circuitId”

3. Verifies the circuitId elements collection has the size of 20

Here we are  using Hamcrest matchers for various validation such as

There are various other methods which is useful to perform certain validation.

You can furthermore refer to the Hamcrest library documentation for a full list of matchers and methods.

Validating response Code :

given().when().get("http://ergast.com/api/f1/2017/circuits.json").then().assertThat().statusCode(200);

Validation of Content Type

given().when().get("http://ergast.com/api/f1/2017/circuits.json").then().assertThat().contentType(ContentType.JSON);

Validating header “Content-Length”

given().when().get("http://ergast.com/api/f1/2017/circuits.json").then().assertThat().header("Content-Length",equalTo("4551"));

Multiple Validation in a single Tests as (By using and() methods ) :

@Test(description = "Number Of Circuits In 2017 Season Should Be 20")
    public void validatingNumberOfCircuits() {
        given().when().get("http://ergast.com/api/f1/2017/circuits.json").then().assertThat().header("Content-Length",equalTo("4551")).and().statusCode(200);
    }

Validating Response Body element/attribute :

We can use JsonPath to fetch the value of the json attributes and put assertion using TestNg

@Test(description = "Validation of series Name which is f1")
    public void validatingSeriesName() {
        //Convert ResponseBody to String
        String responseBody=given().when().get("http://ergast.com/api/f1/2017/circuits.json").getBody().asString();
        //Create JsonPath Object by Passing the Response Body as a string
        JsonPath resJson=new JsonPath(responseBody);
        //Fetch the attribute value series under MRData
        String seriesName=resJson.getString("MRData.series");
        // User TestNg Assertion
        Assert.assertEquals("f1",seriesName);
    }

In the similar fashion we could get the value of XML response using XMLPath .Here we are working with JSON hence we used here JSonPath

RESTful APIs support only two types of parameters:

A. Query parameters: Here parameters are appended at the end of the API endpoint and could be identified by the question mark and forms a key value pair such as 

https://www.google.com/search?q=https://www.wikipedia.org/

Here in the above API ‘q’ is the parameter and ‘https://www.wikipedia.org/’ is value of that parameter, if we to search ‘SOMETHING_ELSE_TEXT’ we could replace the value of the parameter ‘q’ with SOMETHING_ELSE_TEXT’ inplace of https://www.wikipedia.org/ .

B. Path parameters: These are the part of RESTful API endpoint. 

eg. endpoint that we used earlier: http://ergast.com/api/f1/2017/circuits.json, here “2017” is a path parameter value.

To get a result for the year 2016 we could replace 2017 with 2016 then the API will give the response body for 2016 .

Tests using Path Params for RestAssured

@Test(description = "Validation of number of Circuits using Path Params")
    public void testWithPathParams() {
        String seasonNumber = "2017";
       String responseBody = given().pathParam("season", seasonNumber).when().get("http://ergast.com/api/f1/{season}/circuits.json").getBody().asString();
        //Create JsonPath Object by Passing the Response Body as a string
        JsonPath resJson = new JsonPath(responseBody);
        //Fetch the attribute value series under MRData
        String seriesName = resJson.getString("MRData.series");
        // User TestNg Assertion
        Assert.assertEquals("f1", seriesName);
    }

Tests using Query Params for RestAssured

@Test(description = "Validation of Google search using Query Params")
    public void testWithPathParams() {
        String searchItem = "https://www.wikipedia.org/";
  given().queryParam("q",searchItem).when().get("https://www.google.com/search").then().assertThat().statusCode(200);
    }

Parameterizing tests:

We can do data driven testing (ie same test script will be executed multiple times with different sets of input data and provide different output data) using Rest Assured 

STEP 1 : Created a testNg Data Provider .

STEP 2 : Consume the Data Provider in Test script.

@DataProvider(name="seasonsAndRaceNumbers")
    public Object[][] testDataFeed() {
        return new Object[][] {
                {"2017",20},
                {"2016",21}
        };
    }
@Test(description = "Number Of Circuits validation in different Seasons",dataProvider = "seasonsAndRaceNumbers")
    public void circuitNumberValidation(String seasonYear,int raceNumbers) {
given().pathParam("season",seasonYear).when().get("http://ergast.com/api/f1/{season}/circuits.json").then().assertThat().body("MRData.CircuitTable.Circuits.circuitId",hasSize(raceNumbers));
    }

Working with Multi -valued parameters with RestAssured 

Multi-value parameters are those parameters which has more then one value per parameter name (i.e. a list of values per paramKey), we can address them like below :

given().param("paramKey", "paramValue1", "paramaValue2").when().get(“API URL“);

Or we could prepare a list and pass the list as the value of the paramKey like :

List<String>paramValue=new new ArrayList<String>();
paramValue.add(“paramvalue1”);
paramValue.add(“paramvalue2);
given().param("paramKey", paramValue).when().get(“API URL“);
Working with cookie with RestAssured 
given().cookie("cookieK", "cookieVal").when().get("API URL");

Or 

We can also specify a multi-value cookie here like :

given().cookie("cookieK", "cookieVal1", "cookieVal2").when().get(“API  URL”);

Working with Headers :

We can specify in a request using header/headers like :

given().header(“headerK1”,”headerValue1”).header(“headerK2”,”headerValue2”).when().get(“API URL”);

Working with contentType:

given().contentType("application/json").when().get(“API URL”);

Or 

given().contentType(ContentType.JSON).when().get();

Measure the Response Time :

long timeDurationInSeconds = get(“API URL”).timeIn(SECONDS);

Rest API Authentication

REST assured supports different auth schemes, eg OAuth, digest, certificate, form and preemptive basic authentication. We either can set authentication for each and every request 

here is a sample request using the same :

given().auth().basic("uName", "pwd").when().get(“URL “) ..

On the other hand authentication and defined in the below approach for the HTTP requests:

RestAssured.authentication = basic("uName", "pwd");

Basic AUTH Types:

There are two types of basic auth, “preemptive” and “challenged token basic authentication”.

Preemptive Basic Auth:

This will send the basic authentication credential even before the server gives an unauthorized response in certain situations along with the request being triggered, thus reducing the overhead of making an additional connection. This is typically majorly occurring situations unless we’re testing the servers ability to challenge. 

Eg.

given().auth().preemptive().basic("uName", "pwd").when().get("URL").then().statusCode(200);

Challenged Basic Authentication

On the Other hand “challenged basic authentication” REST Assured will not supply the credentials unless the server has explicitly asked for it i.e. server throws the Unauthorized Response. After that UnAuthorized response Rest-Assured sends another request to the server which is the Auth.

given().auth().basic("uName", "pwd").when().get("URL").then().statusCode(200);

Digest Authentication

As of now only “challenged digest authentication” is being considered. eg:

given().auth().digest("uName", "pwd").when().get("URL").then().statusCode(200); 

Form Authentication

We could achieve this majorly in 3 different approaches depending on the Application/Scenarios:

Form authentication is one of very popular over the internet which is an user is entering his credentials ie username & password through a web page and login in to the system.This Could be addressed using this 

given().auth().form("uName", "pWd").
when().get(" URL");
then().statusCode(200);

While this might not work as it’s optimal and it may pass or fail depending on the complexity of the webpage. A better option is to provide these details when setting up the form authentication in the below approach:

given().auth().form("uName", "pwd", new FormAuthConfig("/'mention here form action name which is part of the html page code nder the form tag'", "uName", "pwd")).when().get("URL").then().statusCode(200);

In this approach the REST Assured internally wont require to trigger additional request and parse through the webpage. 

If in case you are using the default Spring Security then a predefined FormAuthConfig is triggered .

given().auth().form("uName", "Pwd", FormAuthConfig.springSecurity()).when().get("URL").then().statusCode(200);

NOTE : If we want to send additional input data along with form auth then we could write the below:

given().auth().form("uName", "pwd", formAuthConfig().withAdditionalFields("firstInputField", "secondInputField"). ..

CSRF :

CSRF stands for Cross-site request forgery.

Nowadays it’s very common for the server to provide a CSRF token with the response to avoid the CSRF security attacks. REST Assured supports this by using and automatic parser and providing CSRF token . 

In order to achieve this REST Assured need to make an additional request and parse (few position)of the website.

We can enable CSRF support by writing the below code:

given().auth().form("uName", "pwd", formAuthConfig().withAutoDetectionOfCsrf()).when().get("URL").then().statusCode(200);

In Addition to assist REST Assured and make the parsing more flawless and robust we can supply the CSRF field name (here we assuming that we’re using Spring Security default values and we could use predefined springSecurity FormAuthConfig):

given().auth().form("uName", "pwd", springSecurity().withCsrfFieldName("_csrf")).when().get("URL").then().statusCode(200);

By default the CSRF value is passed as a form parameter with the request but we can configure to send it as a header if in case its required like below:

given().auth().form("uName", "pwd", springSecurity().withCsrfFieldName("_csrf").sendCsrfTokenAsHeader()).when().get("URL").then().statusCode(200);

OAuth 1 :

OAuth 1 requires Scribe to be in the classpath. To use oAuth 1 authentication we can do:

given().auth().oauth(..).when(). ..

OAuth 2 :

given().auth().oauth2(accessToken).when(). ..

In the above approach the OAuth2 accessToken will be considered in a header. To be more explicit we can also do:

given().auth().preemptive().oauth2(accessToken).when(). ..

Passing File, byte-array, input stream or text in Request:

When sending large amounts of data to the server it’s generally a common approach to use the multipart form data technique. Rest Assured provide methods called multiPart that allows us to specify a file, byte-array, input stream or text to upload. 

given().multiPart(new File("/File_Path")).when().post("/upload");

POST Request Creation with Rest Assured

With POST and PUT requests, we send Data to Server and its basically creation of resources/updation of resources, you can consider this as a write or update operation.

The data which is being sent to the server in a POST request is sent in the body of HTTP request/API call. 

The type of content or data which is being sent can be of different format depending on the API i.e. XML, JSON or some other format is defined by the Content-Type header. 

If POST body consists of the JSON data then the header Content-Type will be application/json.Similarly , for a POST request consisting of a XML then the header Content-Type would be of application/xml type.

Here is the below code snippet for the same:

given().contentType("application/json").param("pk","pv").when().body("JsonPAyloadString").post("url").then().assertThat().statusCode(200);

NOTE: There are different ways we can pass the payload/request body  inside the method “ body “ like String(as shown in above snippet),JsonObject,as a File etc etc,

PUT Request with Rest Assured:

given().contentType("application/json").param("pk","pv").when().body("JsonPAyloadString").put("url").then().assertThat().statusCode(200);

Delete request with Rest-Assured :

given().contentType("application/json").param("pk","pv").when().delete("url").then().assertThat().statusCode(200);

And that way we can create different Rest API call for different API verbs(GET/POST/PUT/DELETE etc)

Serialization and Deserialization in Java :

Serialization is a basically processing or converting the object state to a byte stream. On the other hand the Deserialization in Java is processing or converting the byte stream to actual Java object within memory . This mechanism is used in persistence of Object.

Below is the block diagram for the same 

1ESLuGPTk5gUs9eA5 OXkbw KyHeRnO9TdX bg OEo3 ZD7BJ9HqLY HcOaf9saeK137JSzmDj7 TY2WmrlVogzLzkgmN1gvLvyaF6cdGb6psTcv0HVH98J45L4b1a0c3ucUvJ6p

Advantages of the Serialization

A. To save/persist the state of an object.

B. To flow an object across a network.

Achieving Serialization with JAVA

To achieve a Java object serializable we need to implement the java.io.Serializable interface.

The ObjectOutputStream class which contains writeObject() method responsible for serializing an Object.

The ObjectInputStream class also contains another method called readObject() which is responsible for deserializing an object.

classes which are implementing java.io.Serializable interface, there object can only be serialized.

Serializable is just a marker interface and like other market interface it has no data member or method associated with it.which is used to “mark” java classes so that objects of these classes will get certain capabilities. Like few other marker interfaces are:- Cloneable and Remote etc.

NOTEs :

1. If a parent class has implemented a Serializable interface then child class is not required to implement the same but vice-versa is not applicable.

2. Only non-static data members are stored with the Serialization process.

3. Static data members and also the transient data members are not being stored by the Serialization .So, in case if we dont need to store store the non-static data member’s value then we can make it transient.

4. Constructor is never called when an object is deserialized.

STEP 1 : The first step is basically the creation of a class which implements the Serializable interface:

import java.io.Serializable;
public class Dummy implements Serializable {
    private int i;
    private String  data;
    public Dummy(int i, String data)
    {
        this.i = i;
        this.data = data;
    }
}

STEP 2 :Create a class to serialize it :

import java.io.FileNotFoundException;
import java.io.FileOutputStream;
import java.io.IOException;
import java.io.ObjectOutputStream;
public class  Serialize {
    public static void Serialization(Object classObject, String fileName) {
        try {
            FileOutputStream fileStream = new FileOutputStream(fileName);
            ObjectOutputStream objectStream = new ObjectOutputStream(fileStream);
            objectStream.writeObject(classObject);
            objectStream.close();
            fileStream.close();
        } catch (FileNotFoundException e) {
            // TODO Auto-generated catch block
            e.printStackTrace();
        } catch (IOException e) {
            // TODO Auto-generated catch block
            e.printStackTrace();
        }
    }
    public static void main(String[] args) {
        Dummy dummyObj = new Dummy(10, "Lambda-geeks");
        Serialization(dummyObj, "DummSerialized");
    }
}

STEP 3 : Once Step2 is completed successfully then you would get to see a file got created with some data in it ,that data is basically serialized data of the Object members.

  Deserialization with java :

Here is the below code snippet :

 public static Object DeSerialize(String fileName)
    {
        try {
            FileInputStream fileStream = new FileInputStream(new File(fileName));
            ObjectInputStream objectStream = new ObjectInputStream(fileStream);
            Object deserializeObject = objectStream.readObject();
            objectStream.close();
            fileStream.close();
            return deserializeObject;
        } catch (FileNotFoundException e) {
            e.printStackTrace();
        } catch (IOException e) {
            e.printStackTrace();
        } catch (ClassNotFoundException e) {
            e.printStackTrace();
        }
        return null;
    }

Driver Code goes like this :

 public static void main(String[] args) {
      /*  Dummy dummyObj = new Dummy(10, "Lambda-geeks");
        Serialization(dummyObj, "DummSerialized");
        System.out.println("--------------------------------------------------------------------------");
      */
        Dummy deSerializedRect = (Dummy) DeSerialize("DummSerialized");
        System.out.println("Data From Serialized Object " + deSerializedRect.print());
        System.out.println("--------------------------------------------------------------------------");
    }

JSONPATH More Syntax/Query :

Lets Assume a JSON as below :

{
  "OrganizationDetails": "Dummy Details of the Organization",
  "Region": "Asia",
  "Emp-Details": [
    {
      "Org": "lambda-Geeks",
      "Information": {
        "Ph": 1234567890,
        "Add": "XYZ",
        "Age": 45
      }
    },
    {
      "Org": "lambda-Geeks-2",
      "Information": {
        "Ph": 2134561230,
        "Add": "ABC",
        "Age": 35
      }
    }
  ]
}

in the above JSON , the OrganizationDetails & Region are called as Leaf node reason being they are not having any further child nodes/elements but  as on the other hand the Emp-Details having child node , hence its not referred as Leaf node.

Here if we try get the value of  OrganizationDetails then we need to use :

$.OrganizationDetails 
This will result in :
 [
  "Dummy Details of the Organization"
]

Like Wise to get the data for region we need to write :

$.Region 

If we want to find the value of  Age for the 1st Employee then we could write :

$.Emp-Details[0].Information.Age
This will result in :
[
  45
]

For the Age of the 2nd Employee  we could write like

$.Emp-Details[1].Information.Age
This will result in : 
[
  35
]

This way we can figure out the JsonPath expression/query to fetch the data for the respective fields in the JSON.

41 Interesting Application security interview questions

Application Security Interview QA 1 212x300 1

Application security interview questions

We will discuss around Application security interview questions/Penetration testing interview questions which consists of a list of Most Frequently Asked questions about security and also covered Security Engineer Interview Questions and cyber security interview questions:

Critical || Application security interview questions

Major || Application security interview questions

Basic|| Application security interview questions

Application Security interview Questions
Application Security Interview Questions

Base Level -1 || Critical || Application security interview questions

How would an HTTP program handle state?

HTTP being a stateless protocol uses cookies to handle the web application state.HTTP can handle web application state in the below approaches and maintains session :

The data might be stored in cookies or in the web server’s session.

What do you understand by Cross Site Scripting or XSS?

Cross-site Scripting abbreviated as XSS is a client-side code injection issue where the un-authorised user aims to execute malicious scripts in user’s web browser by incorporating malicious code in a web application and hence once the user visits that web application then the malicious code gets executed resulting in the cookies, session tokens along with other sensitive information to be compromised.

What are the types of XSS?

There are majorly three different categories of XSS:

Reflected XSS: In this approach, the malicious script is not stored in the database in case of this vulnerability; instead, it comes from the current HTTP request.

Stored XSS: The suspicious scripts got stored in the Database of the web application and can get initiated from there by impacted person’s action by several ways such as comment field or discussion forums, etc.

DOM XSS: In DOM (Document Object Model)XSS, the potential issues exists within the client-side code instead of the server-side code. Here in this type, the malicious script flows in the browser and acts as a source script in DOM.

This potential impact arises when a client-side code reads data from the DOM and processes this data without filtering the input.

What are the owasp top 10 of 2021 ?

Mention the owasp risk rating methodology ?

The Owasp risk rating methodologies are segregated in the different layers , such as :

Explain how does the tracert or tracerout operates ?

Tracerout or tracert as the name suggests basically monitors and analyze the route between host machine to remote machine. it performs the below activities :

What is ICMP?

ICMP stands for Internet Control Message Protocol, located at the Network layer of the OSI model, and is an integral part of the TCP/IP.

Which port is for ICMP or pinging?

Ping doesn’t require any port and uses ICMP. It is used to identify whether the remote host is in an active status or not, and also it identifies the packet loss and round-trip delay while within the communication.

Mention the list of challenges for the successful deployment and monitoring the web intrusion detection?

Mention the risk that involves from unsecure HTTP cookies with tokens ?

Access Control Violation impact gets triggered when not flagging HTTP cookies along with secure tokens.

Mention the basic design of OWASP ESAPI?

The major OWASP ESAPI design are:

What is port scanning?

Scanning of the ports to discover that there can be some weak points in the system to which un-authorised user can target and pull some critical and sensitive data information.

Mention the different types of port scans ?

What is a honeypot?

The honeypot is a computer system that mimics likely targets of cyber issues. Honeypot basically used for detection and deflection vulnerability from a legitimate target.

Among Windows and Linux which one provides security ?

Both of the OS have their pros and cons. Still, as per the security is concerned, most of the community prefer to use Linux as it provides more flexibility & security compared to Windows, considering that many security researchers have contributed to securing Linux.

Which is mostly implemented protocol on a login page?

The TLS/SSL protocol is implemented in most of the scenarios while data is in transmission layers.This is to be done to achieve the confidentiality and integrity of user’s critical and sensitive data by using encryption in the transmission layer.

What is public-key cryptography?

Public Key Cryptography (PKC), also known as asymmetric cryptography, is a cryptography protocol which requires two separate sets of keys, ie one private and another one is public for data encryption & decryption.

State the difference between private and public-key cryptography while performing the encryption and signing content?

In the case of digital signing, the sender uses the private key to sign the data and on the other hand receiver verifies and validates the data with the public key of the sender itself.

While in encryption, the sender encrypts the data with the public key of the receiver and receiver decrypt and validates it using his/her private key.

Mention the major application of the public-key cryptography?

The major use cases of public-key cryptography are :

Discuss about the Phishing issues?

In Phishing, the fake web page is being introduced to trick the user and manipulate him to submit critical and sensitive information.

What approach you can take to defend the phishing attempts?

XSS vulnerabilities verification and validation and HTTP referer header are some mitigation approaches against the phishing.

How to defend against multiple login attempts?

There are different approaches to defend against several login attempts, such as :

What is Security Testing?

Security testing is one of the major important areas of testing to identify the possible vulnerabilities in any software (any system or web or networking or Mobile or any other devices ) based application and protect their confidential and sesitive data sets from potential risk and intruders.

What is “Vulnerability”?

Answer: Vulnerability is considered as the weakness/bug/flaw in any system through which an un-authorised user can target the system or the user who is using the application.

What is Intrusion Detection?

Answer: IDS or intrusion detection system is software or hardware application that monitors a network for unapproved activity or policy violations. Under this situations it is typically reported and resolved using security information and respective event management system.

Few Intrusion Detection systems are capable enough to respond to the detected intrusion upon discovery, known as intrusion prevention systems (IPS).

Base Level -2 || Major || Application security interview questions

What are Intrusion Detection System, type :

The IDS Detection majorly of the below types :

Along with these, there is a subset of IDS types , out of which the major variants are based on anomaly detection and signature detection

What do you know about OWASP?

OWASP is known as Open Web Application Security Project is an organisation which supports secure software development.

What potential issues arises if the session tokens has insufficient randomness across range values?

Session tampering arises from the issue with session tokens having insufficient randomness within a values of range .

What is “SQL Injection”?

Answer: SQL injection is one of the most common techniques in which a code is injected in the SQL statements via a web page input that might destroy your database and potentially expose all the data from your DB.

What do you understand by SSL session and also the SSL connections ?

Answer: SSL is known as Secured Socket Layer connection establishes the communication with peer-to-peer link having both the connection maintains SSL Session.

An SSL session represents the security contract, which in terms consists of key and algorithm agreement information that takes place over a connection between an SSL client connected to an SSL server using SSL.

An SSL session is governed by security protocols that control the SSL sessions parameter negotiations between an SSL client and SSL server.

Name the two standard approaches which are used to provide protection to a password file?

Answer: Two majorly applied approaches for password file protection are

What is IPSEC?

The IPSEC also known as IP security is an Internet Engineering Task Force (IETF) standard protocols suite among the two various communication layers across the IP network. It ensures dataset integrity, authentication and also the confidentiality. It generates the authenticated data packets with encryption, decryption.

What is the OSI model :

The OSI model also known as Open Systems Interconnection ,is a model that enables communication using standard protocols with the help of diverse communication systems. The International Organization for Standardization is creating it.

What is ISDN?

ISDN stands for Integrated Services Digital Network, a circuit-switched telephone network system. It provides packet switched networks access which allows the digital transmission of voice along with data. Over this network, the quality of data and voice is much better than an analog device/phone.

What is CHAP?

CHAP, also referred as Challenge Handshake Authentication Protocol (CHAP) which is basically a P-2-P protocol (PPP) authentication protocol where the initial startup of the link is used. Also, it performs a periodic health check of the router communicates with the host.CHAP is developed by IETF (Internet Engineering Task Force).

What is USM, and what does it perform?

USM stands for the User-based Security Model, is utilised by System Management Agent for decryption , encryption, decryption, and authentication as well for SNMPv3 packets.

Mention some factors that can cause vulnerabilities?

Answer: The majority of areas that might cause the potential vulnerabilities are :

Mention the parameters list to define SSL session connection?

Answer: The attributes which all define an SSL session connection are:

What is file enumeration?

Answer: Its a type of issues where the forceful browsing takes place by manipulating the URL where the un-authorised user exploit the URL parameters and get sensitive data.

What are the advantages of intrusion detection system?

Answer: The Intrusion detection system has the below advantages:

Base Level -3 || Basic|| Application security interview questions

What is Host Intrusion Detection System?

The (HIDSs)Host-based intrusion detection systems (HIDSs) are applications that operate on information collected from individual computer systems and serves on the existing system and compare with the previous mirror/snapshot of the system and validates for whether any data modification or manipulation has been done and generates an alert based on the output.

It can also figure out which processes and users are involved in malicious activities.

What is NNIDS?

NNIDS stands for Network Node Intrusion Detection System (NNIDS), which is like a NIDS, but it’s only applicable to one host at a single point of time, not an entire subnet.

Mention three intruders classes?

There are various intruder types, such as :

Mention the components which are used in SSL?

SSL establishes the secure connections among the clients and servers.

Disclaimer: This Application security interview questions tutorial post is for educational purpose only. We don’t promote/support any activity related to security issues/conduct. Individual is solely responsible for any illegal act if any.